Getting Up and Running with PyTorch on Amazon Cloud

This is a succint tutorial aimed at helping you set up an AWS GPU instance so that you can train and test your PyTorch models in the cloud. If you don’t own a GPU like me, this can be a great way of drastically reducing the training time of your models, so while your instance is furiously crunching numbers in some faraway Amazon server, you can peacefully experiment with and prototype new architectures from the comfort of a Starbucks couch.

The cool part is that if you’re a high school or college student, you can sign up for a Github Developer pack which will get you $150 worth of free AWS credits. That’s around 167 hours or 7 days of compute time1, an amply sufficient amount for those fun weekend side projects and experiments. As usual, any code or script that appears on this page can be downloaded from my Blog Repository. And on that note, let’s get started!
Table of Contents
- Configuring Your EC2 Instance
- Launching & Managing Your EC2 Instance
- SSH Persistence With TMUX
- Conclusion
Configuring Your EC2 Instance
I’m assuming you’ve already created an AWS account but if you haven’t, the whole process shouldn’t take you more than 2 minutes. Note that it will require you to enter your credit card information which is necessary to charge you if and when you exceed your free credits. Now’s also a great time to claim your GitHub Student Developer Pack credits so go ahead and do that.
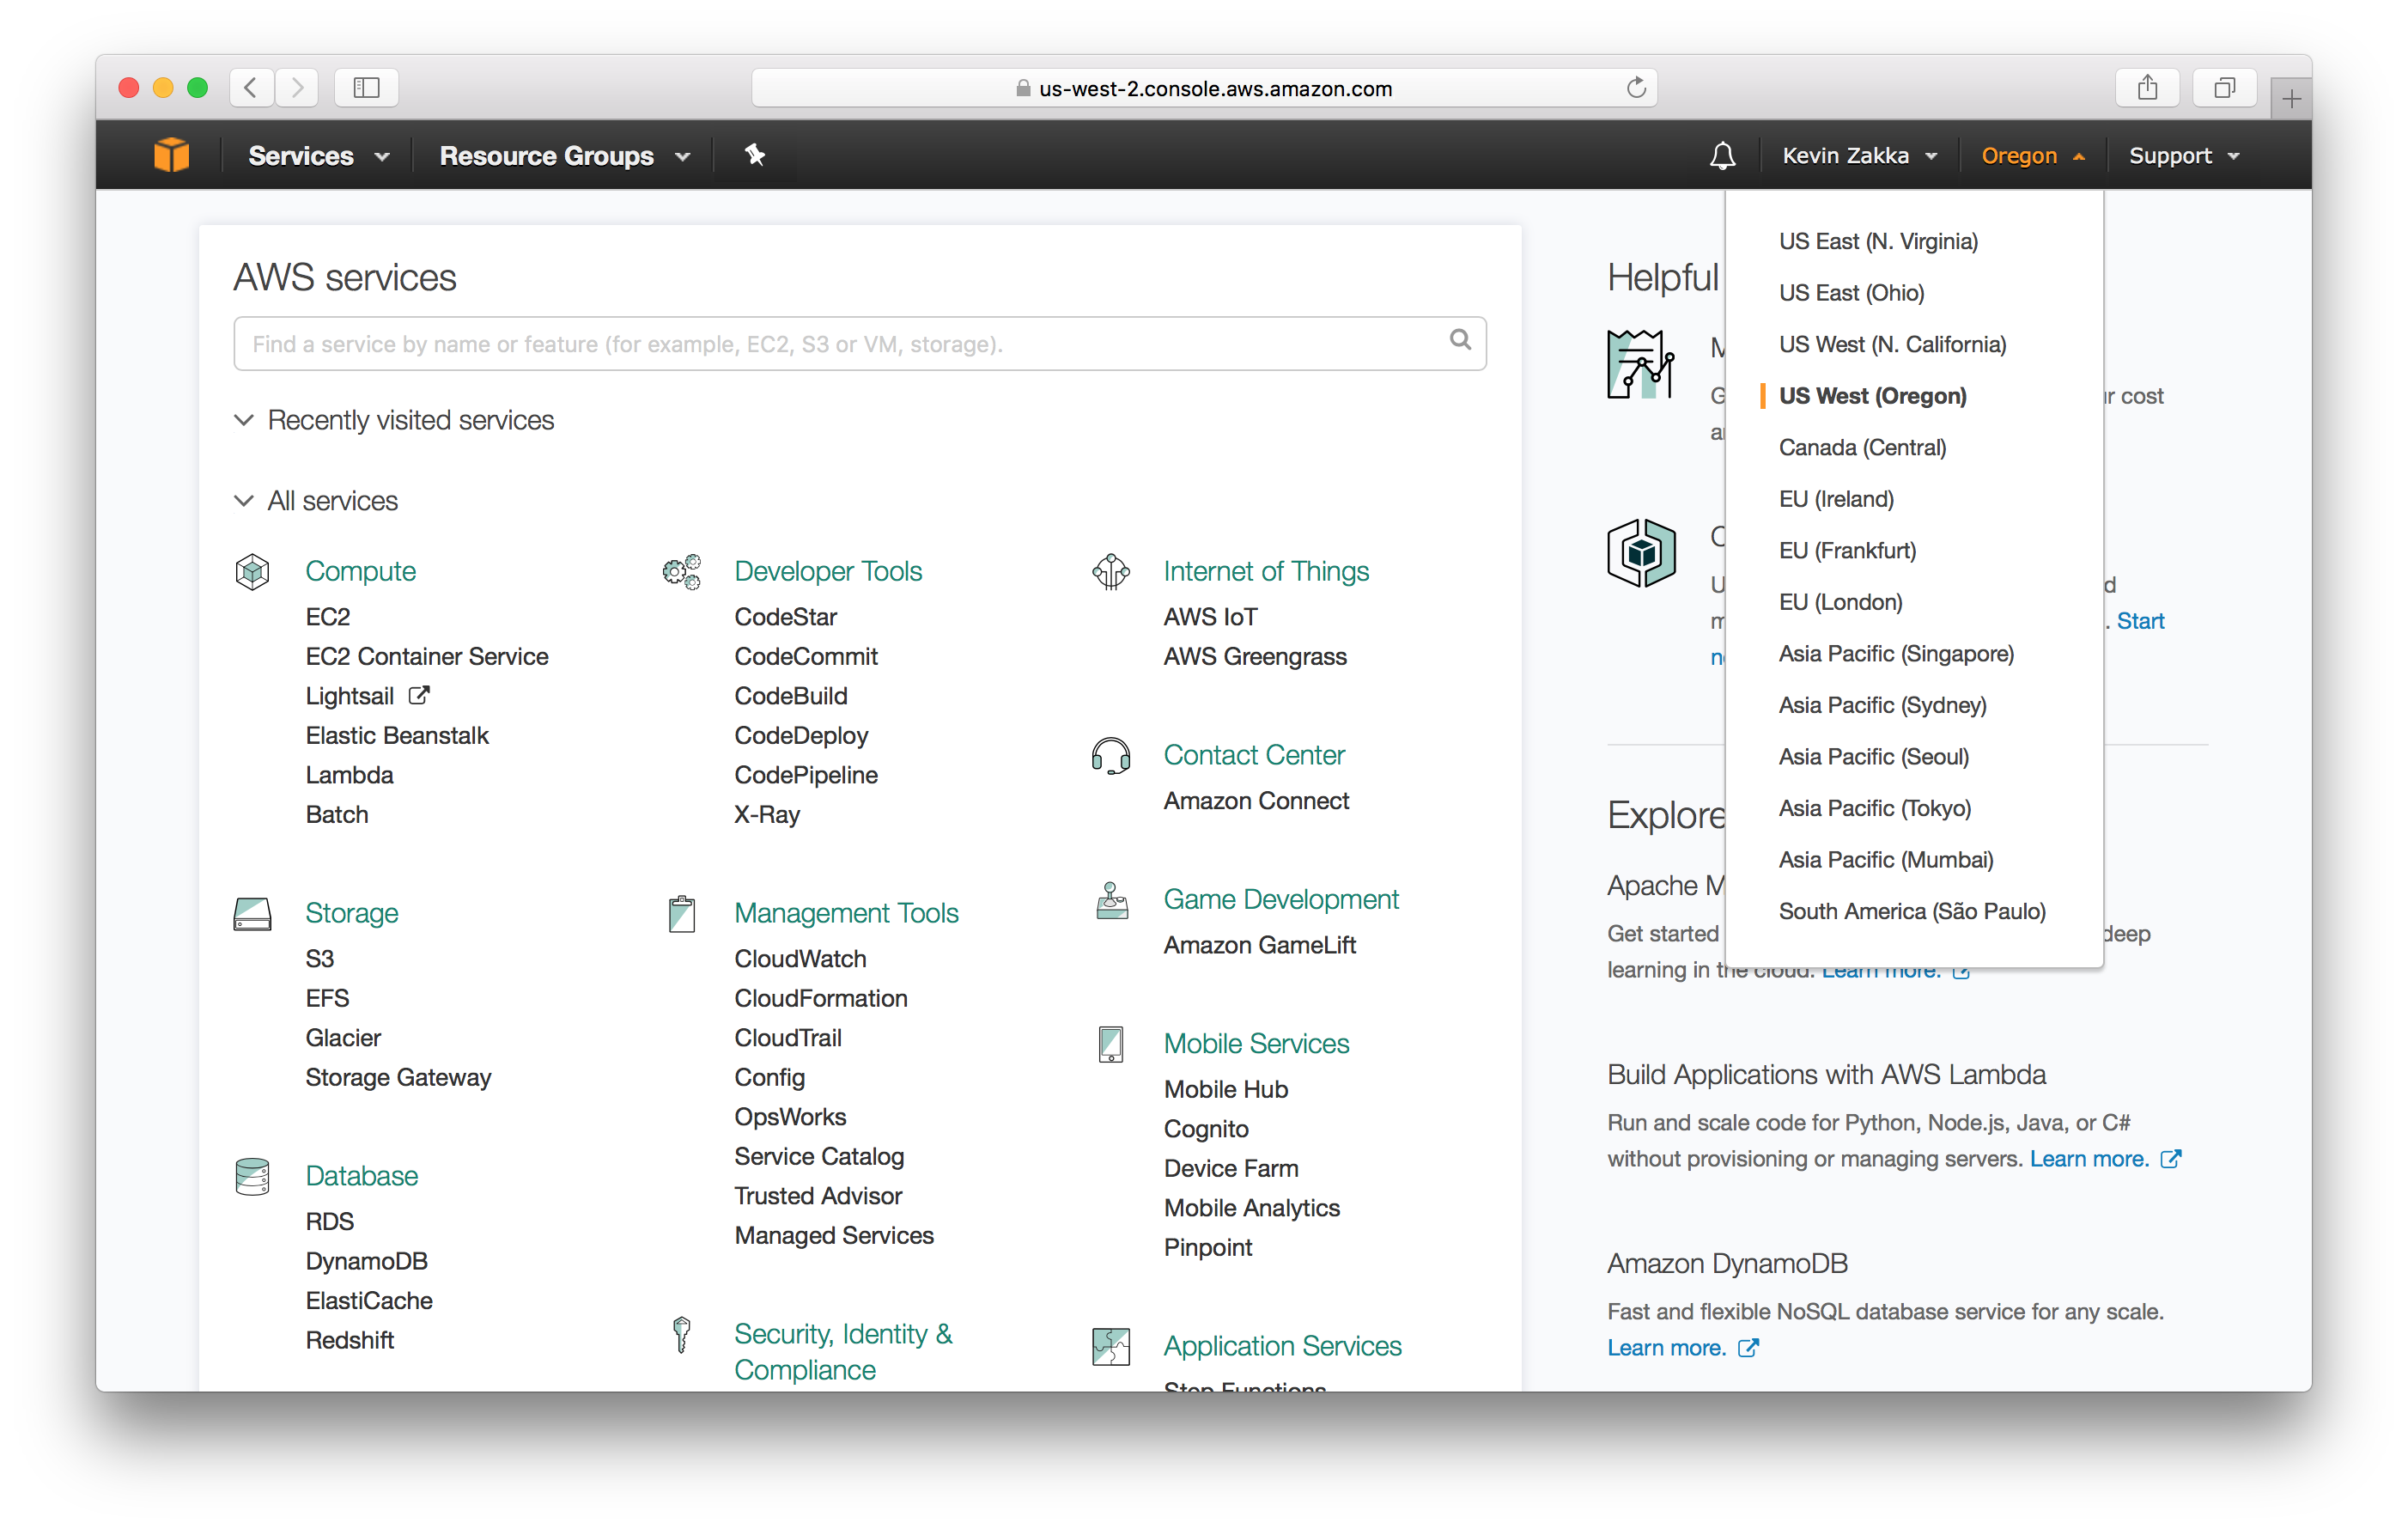
Pick your Region. Ok, so the instance type we are going to use is located in US West (Oregon) so make sure the region information on the top right of the screen correctly reflects that.
Limit Increase. The next thing we need to do is request a limit increase for EC2 instances. For some weird reason, Amazon automatically sets the limit to 0 upon account creation so it has to be increased by sending in a support ticket.
Go ahead and click Support > Support Center at the top right of your screen. This will direct you to a page with a blue Create Case button that you should click. You’ll be greeted with the following:
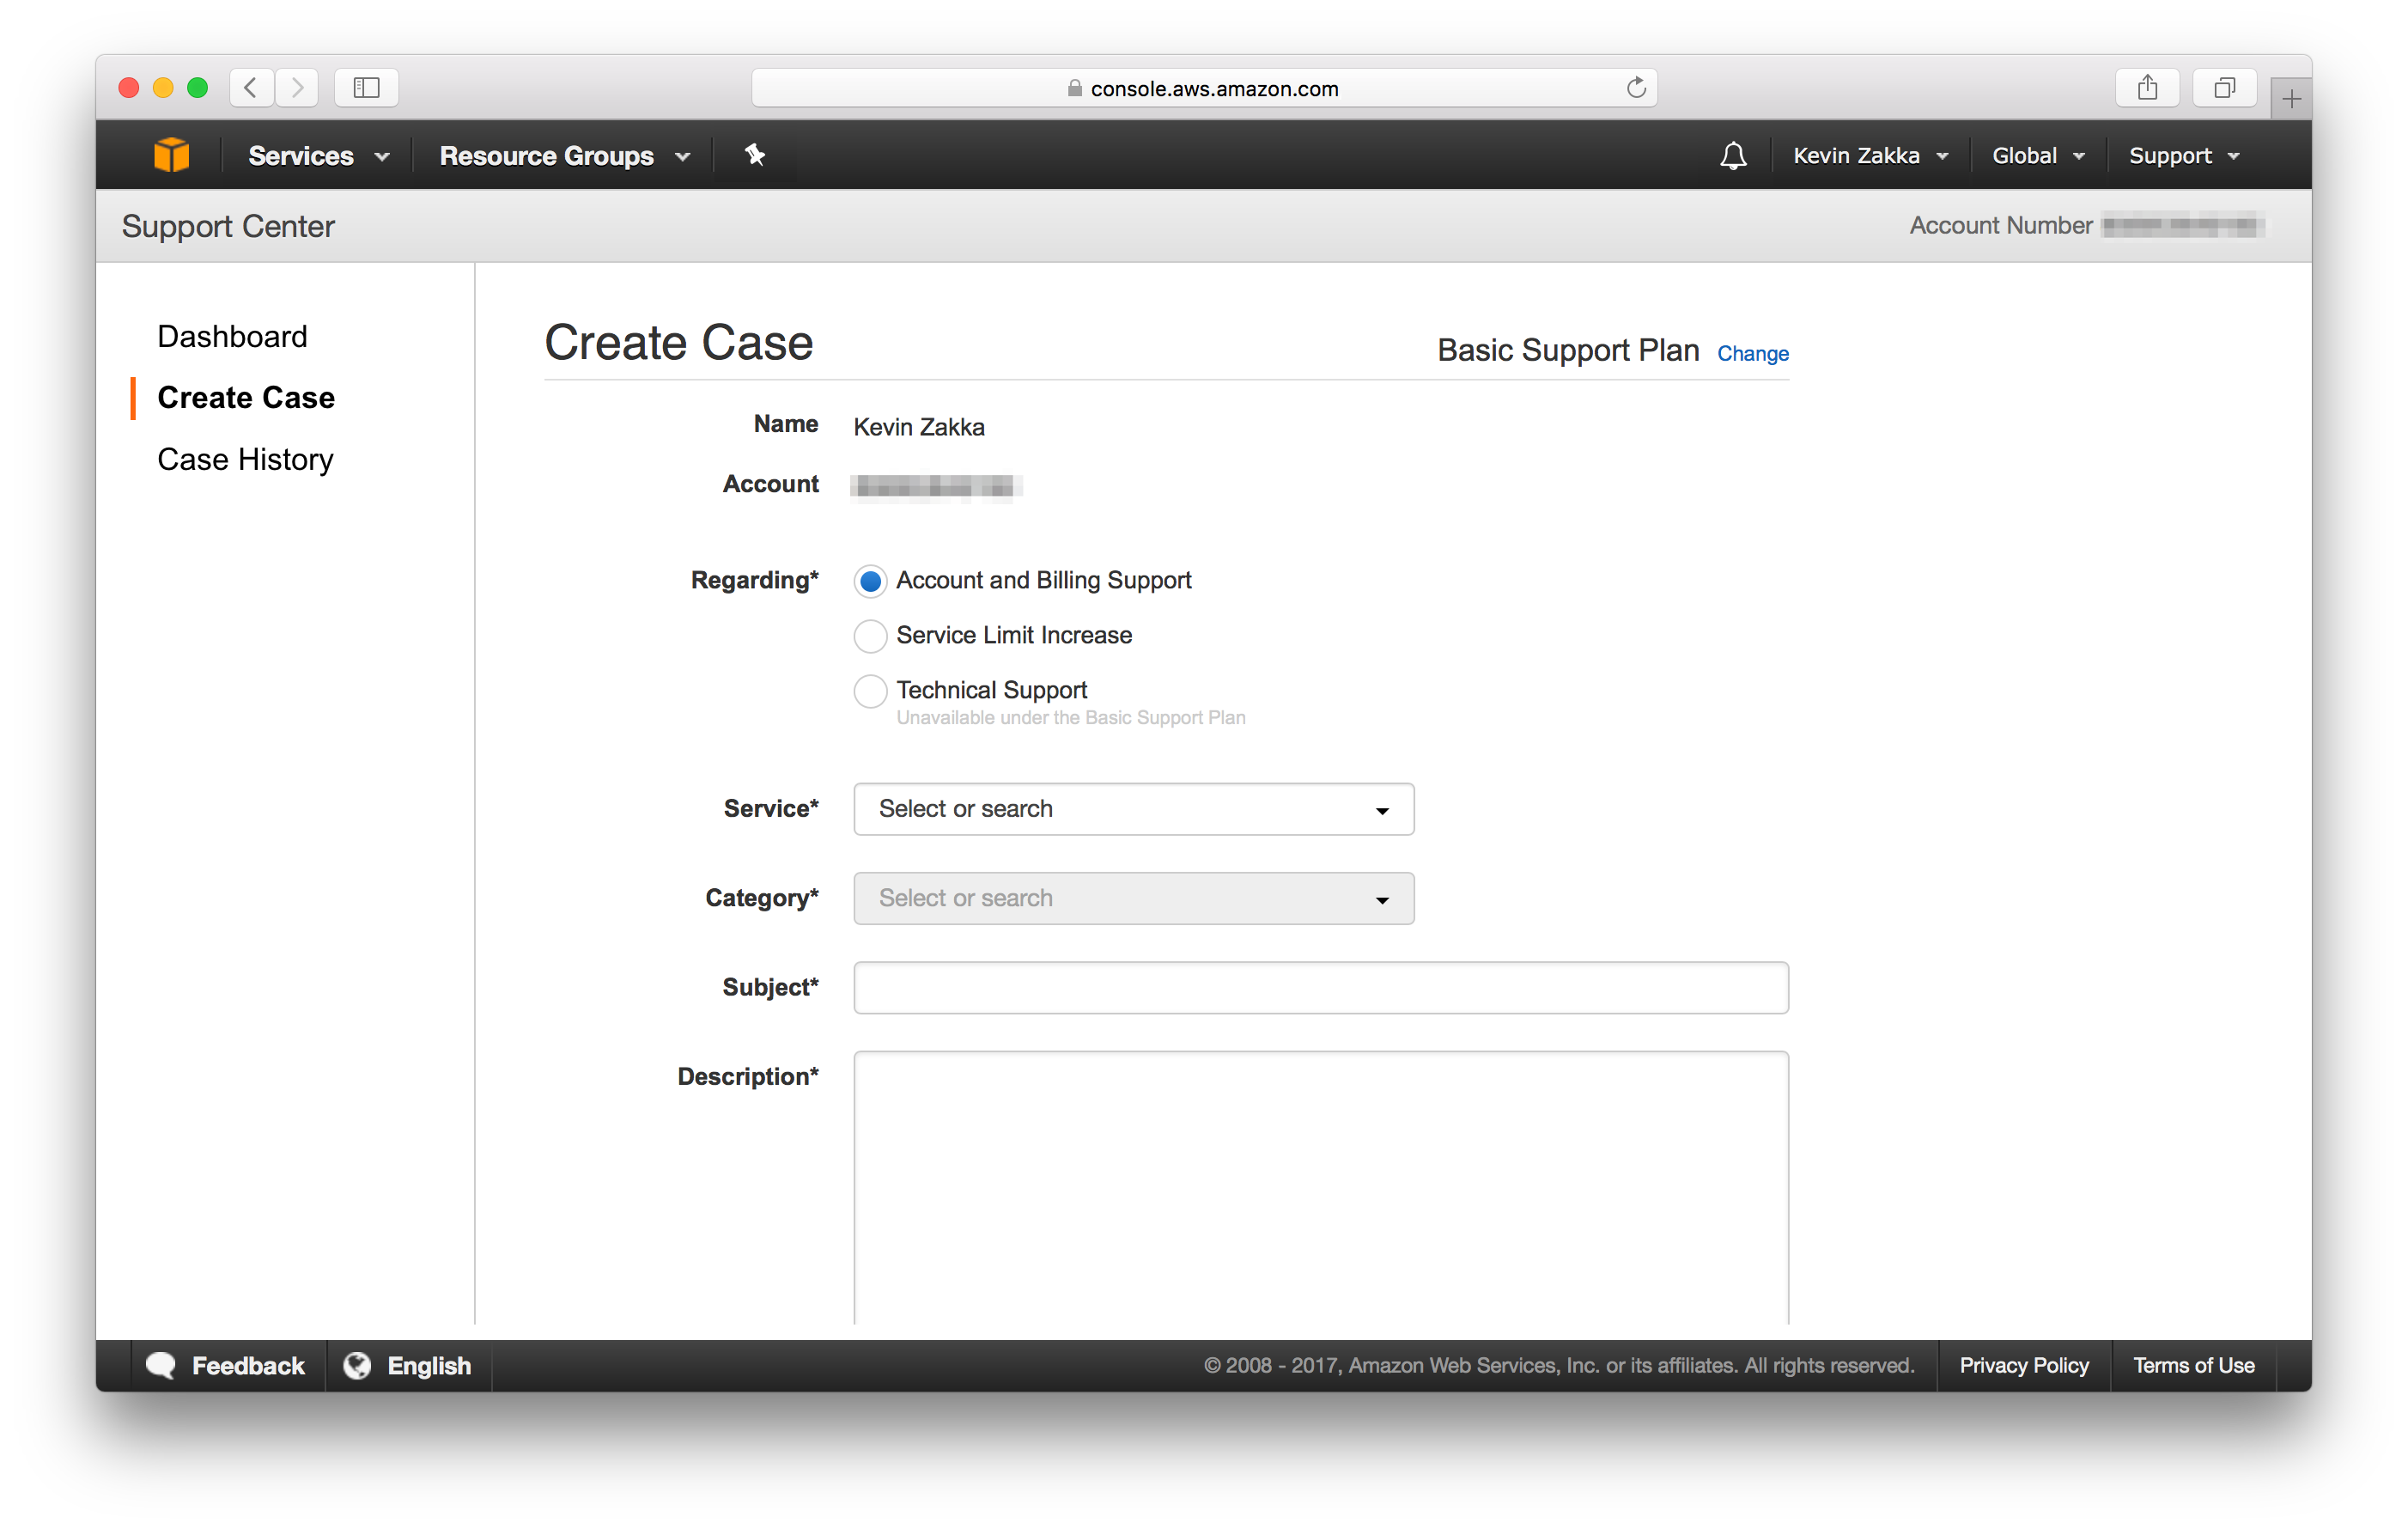
We want a Limit Increase for EC2 instances meaning you need to select Service Limit Increase in Regarding and EC2 Instances in Limit Type. Now fill in the Request 1 box and Use Case Description as I’ve done here.
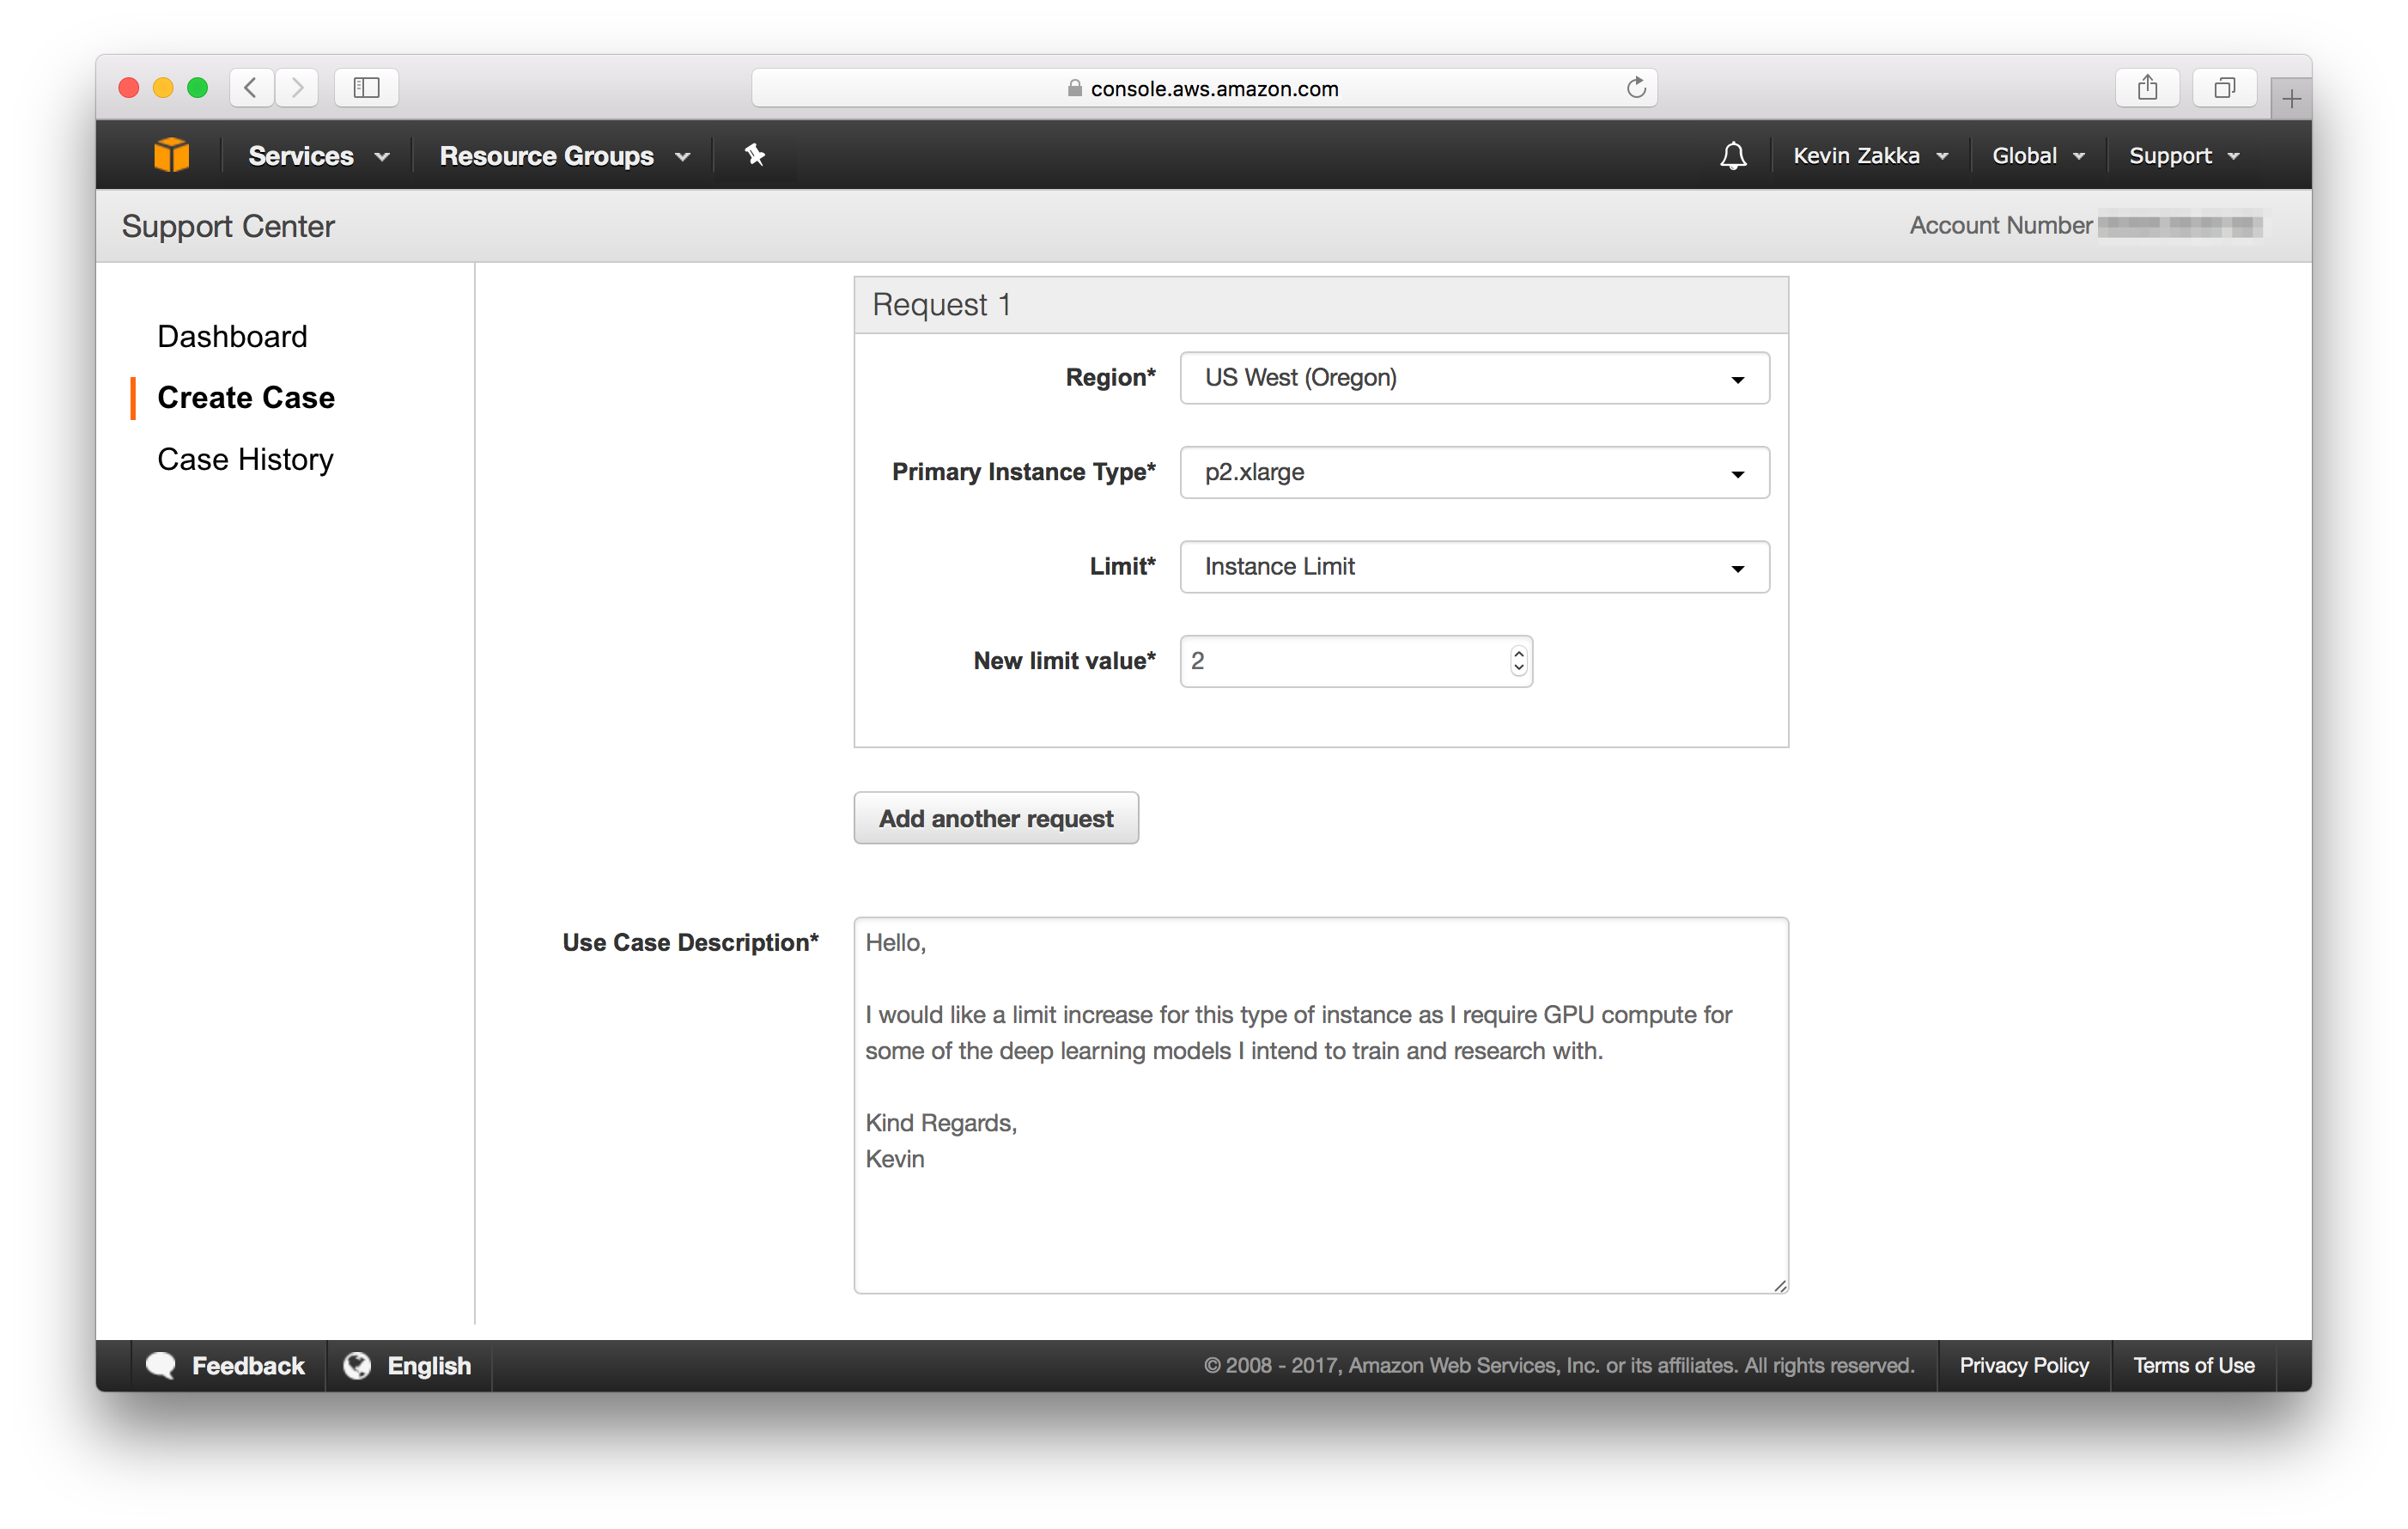
Finally, make sure to select Web as your Contact method and submit the request. Note that the time of response varies: I’ve had limit increases resolved in a matter of minutes and sometimes up to a full day, so be patient. Also, feel free to change the New limit value to suit your needs. I’ve opted for 2 because the p2.xlarge instance type we’ll be working with has a single GPU with memory constraints that may limit the number of jobs I may run concurrently.
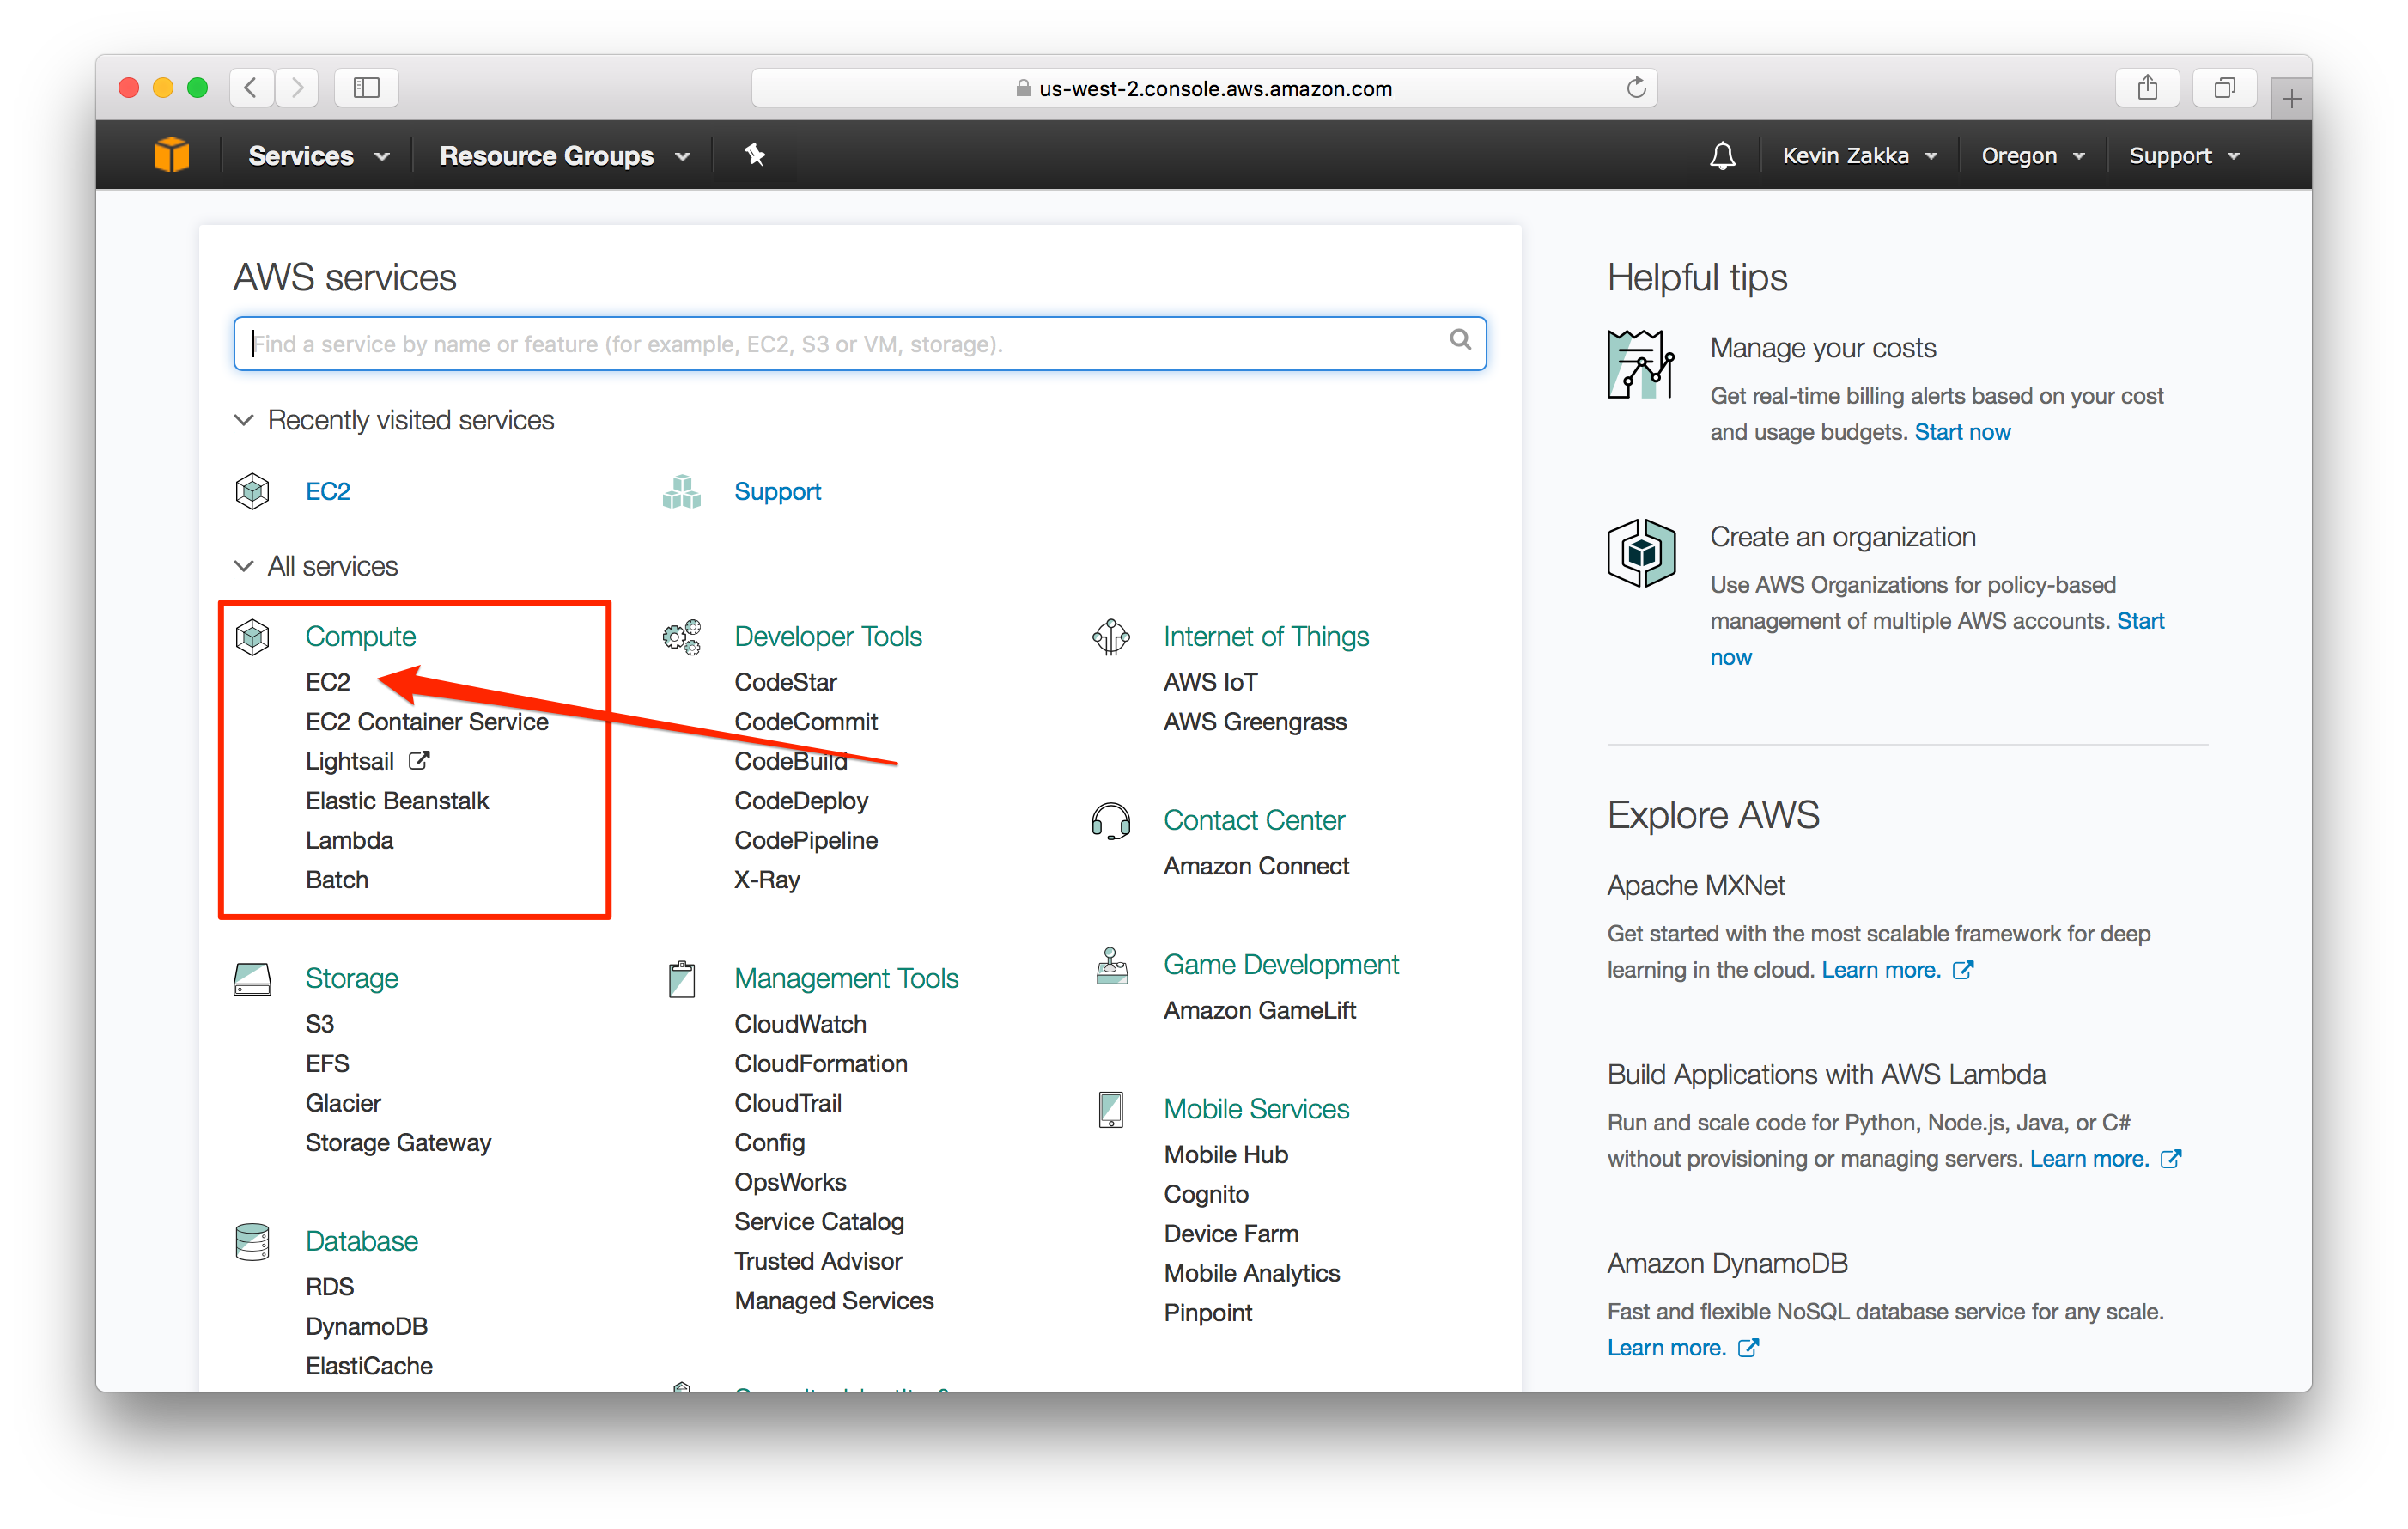
Configure Instance. Ok, we’re now ready to create and configure our EC2 instance. Back on the home page console (click on the orange cube in the top left), navigate to EC2 in the Compute services section, and then click on the blue Launch Instance button.
You’ll be greeted with a 7-step process like so.
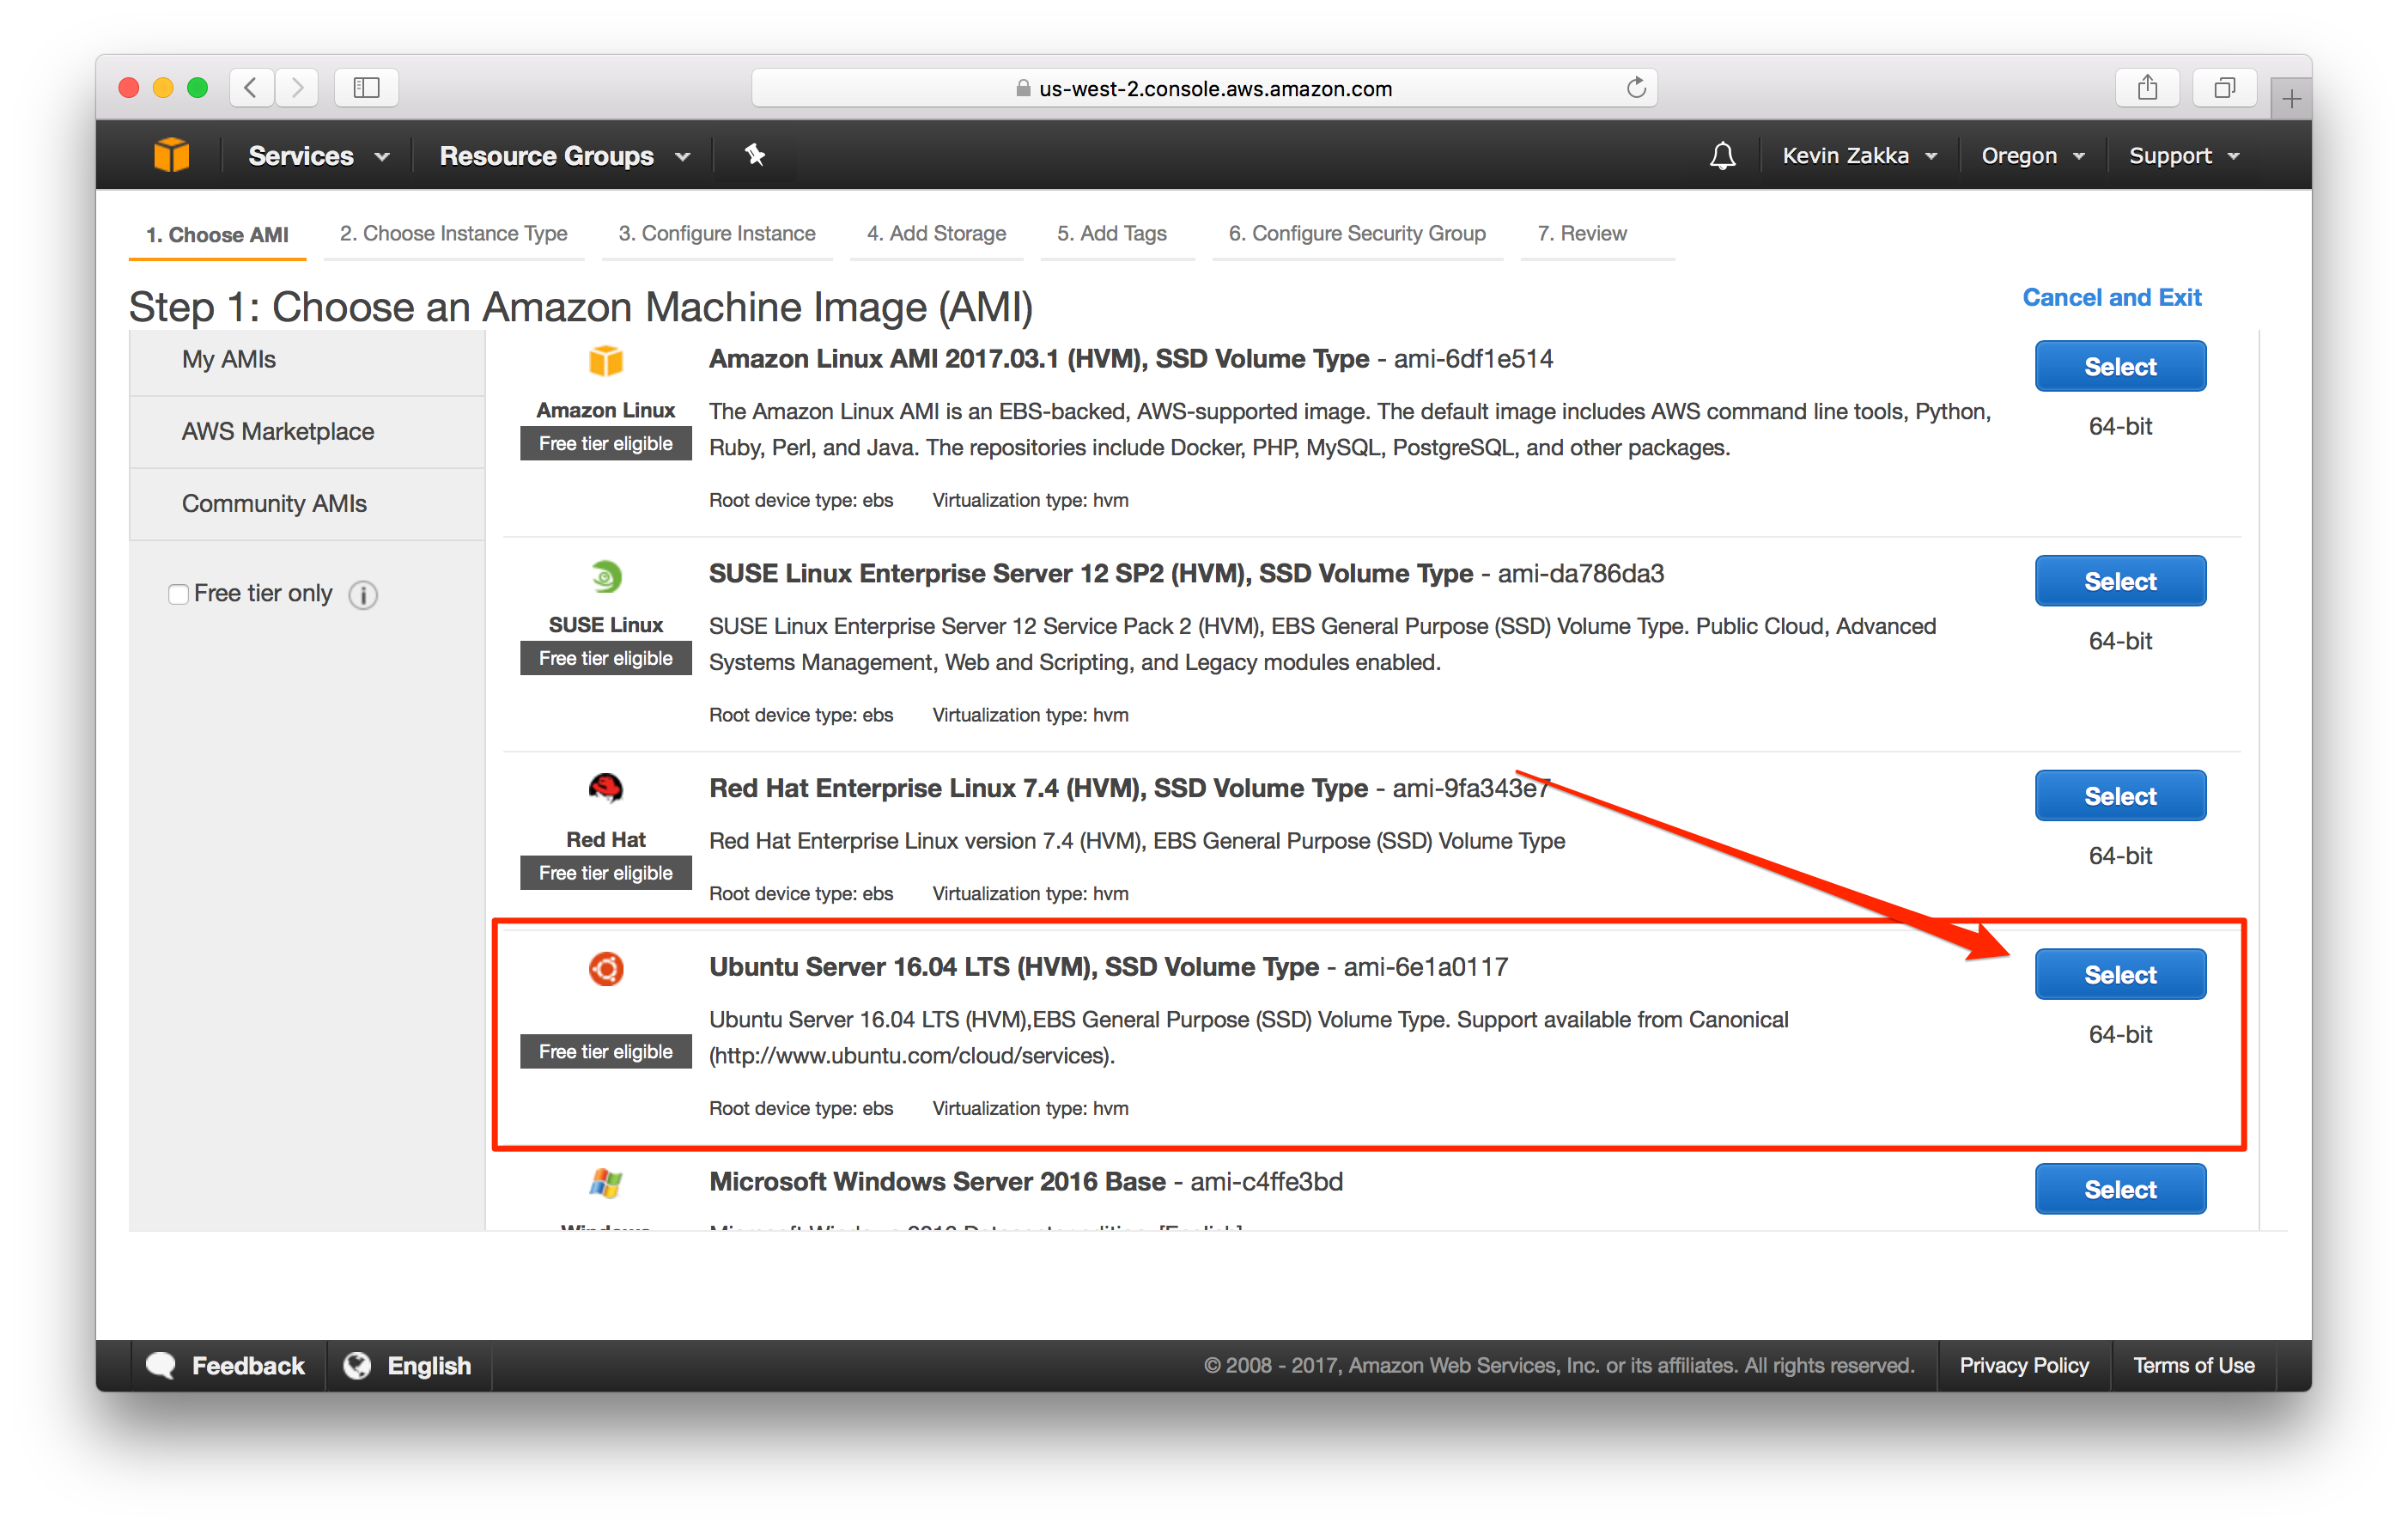
AMI. First select the Ubuntu Server 16.04 LTS (HVM), SSD Volume Type as the AMI of choice.
Instance. Select p2.xlarge as your instance type. This is an instance with a single GPU which is what we asked for in our limit increase request.
Spot Instances. At this point, you should be on the Configure Instance Details step. This is where things get interesting. In fact, Amazon gives us the ability to bid on spare Amazon EC2 computing capacity for a much cheaper price than the on-demand one.
Basically, what that means is that if our bid price is higher than the current market price, our instance will be launched and charged at that price. The only downside is that if that ever flips around, instances get terminated instantly and with no warning2.
TL;DR: Spot instances can be ideal for non-critical experimentation like hyperparameter tuning but stay away from them if you need to train a model for a large number of epochs.
I’ll assume the user uses On-Demand pricing for the remainder of this post but if you do want to find out more about Spot Instances, feel free to watch this Youtube video.
Add Storage. Next, we’ll be increasing the size of our Root Volume to accomodate large datasets such as ImageNet which is around 48 Gb. Feel free to enter any number above that.
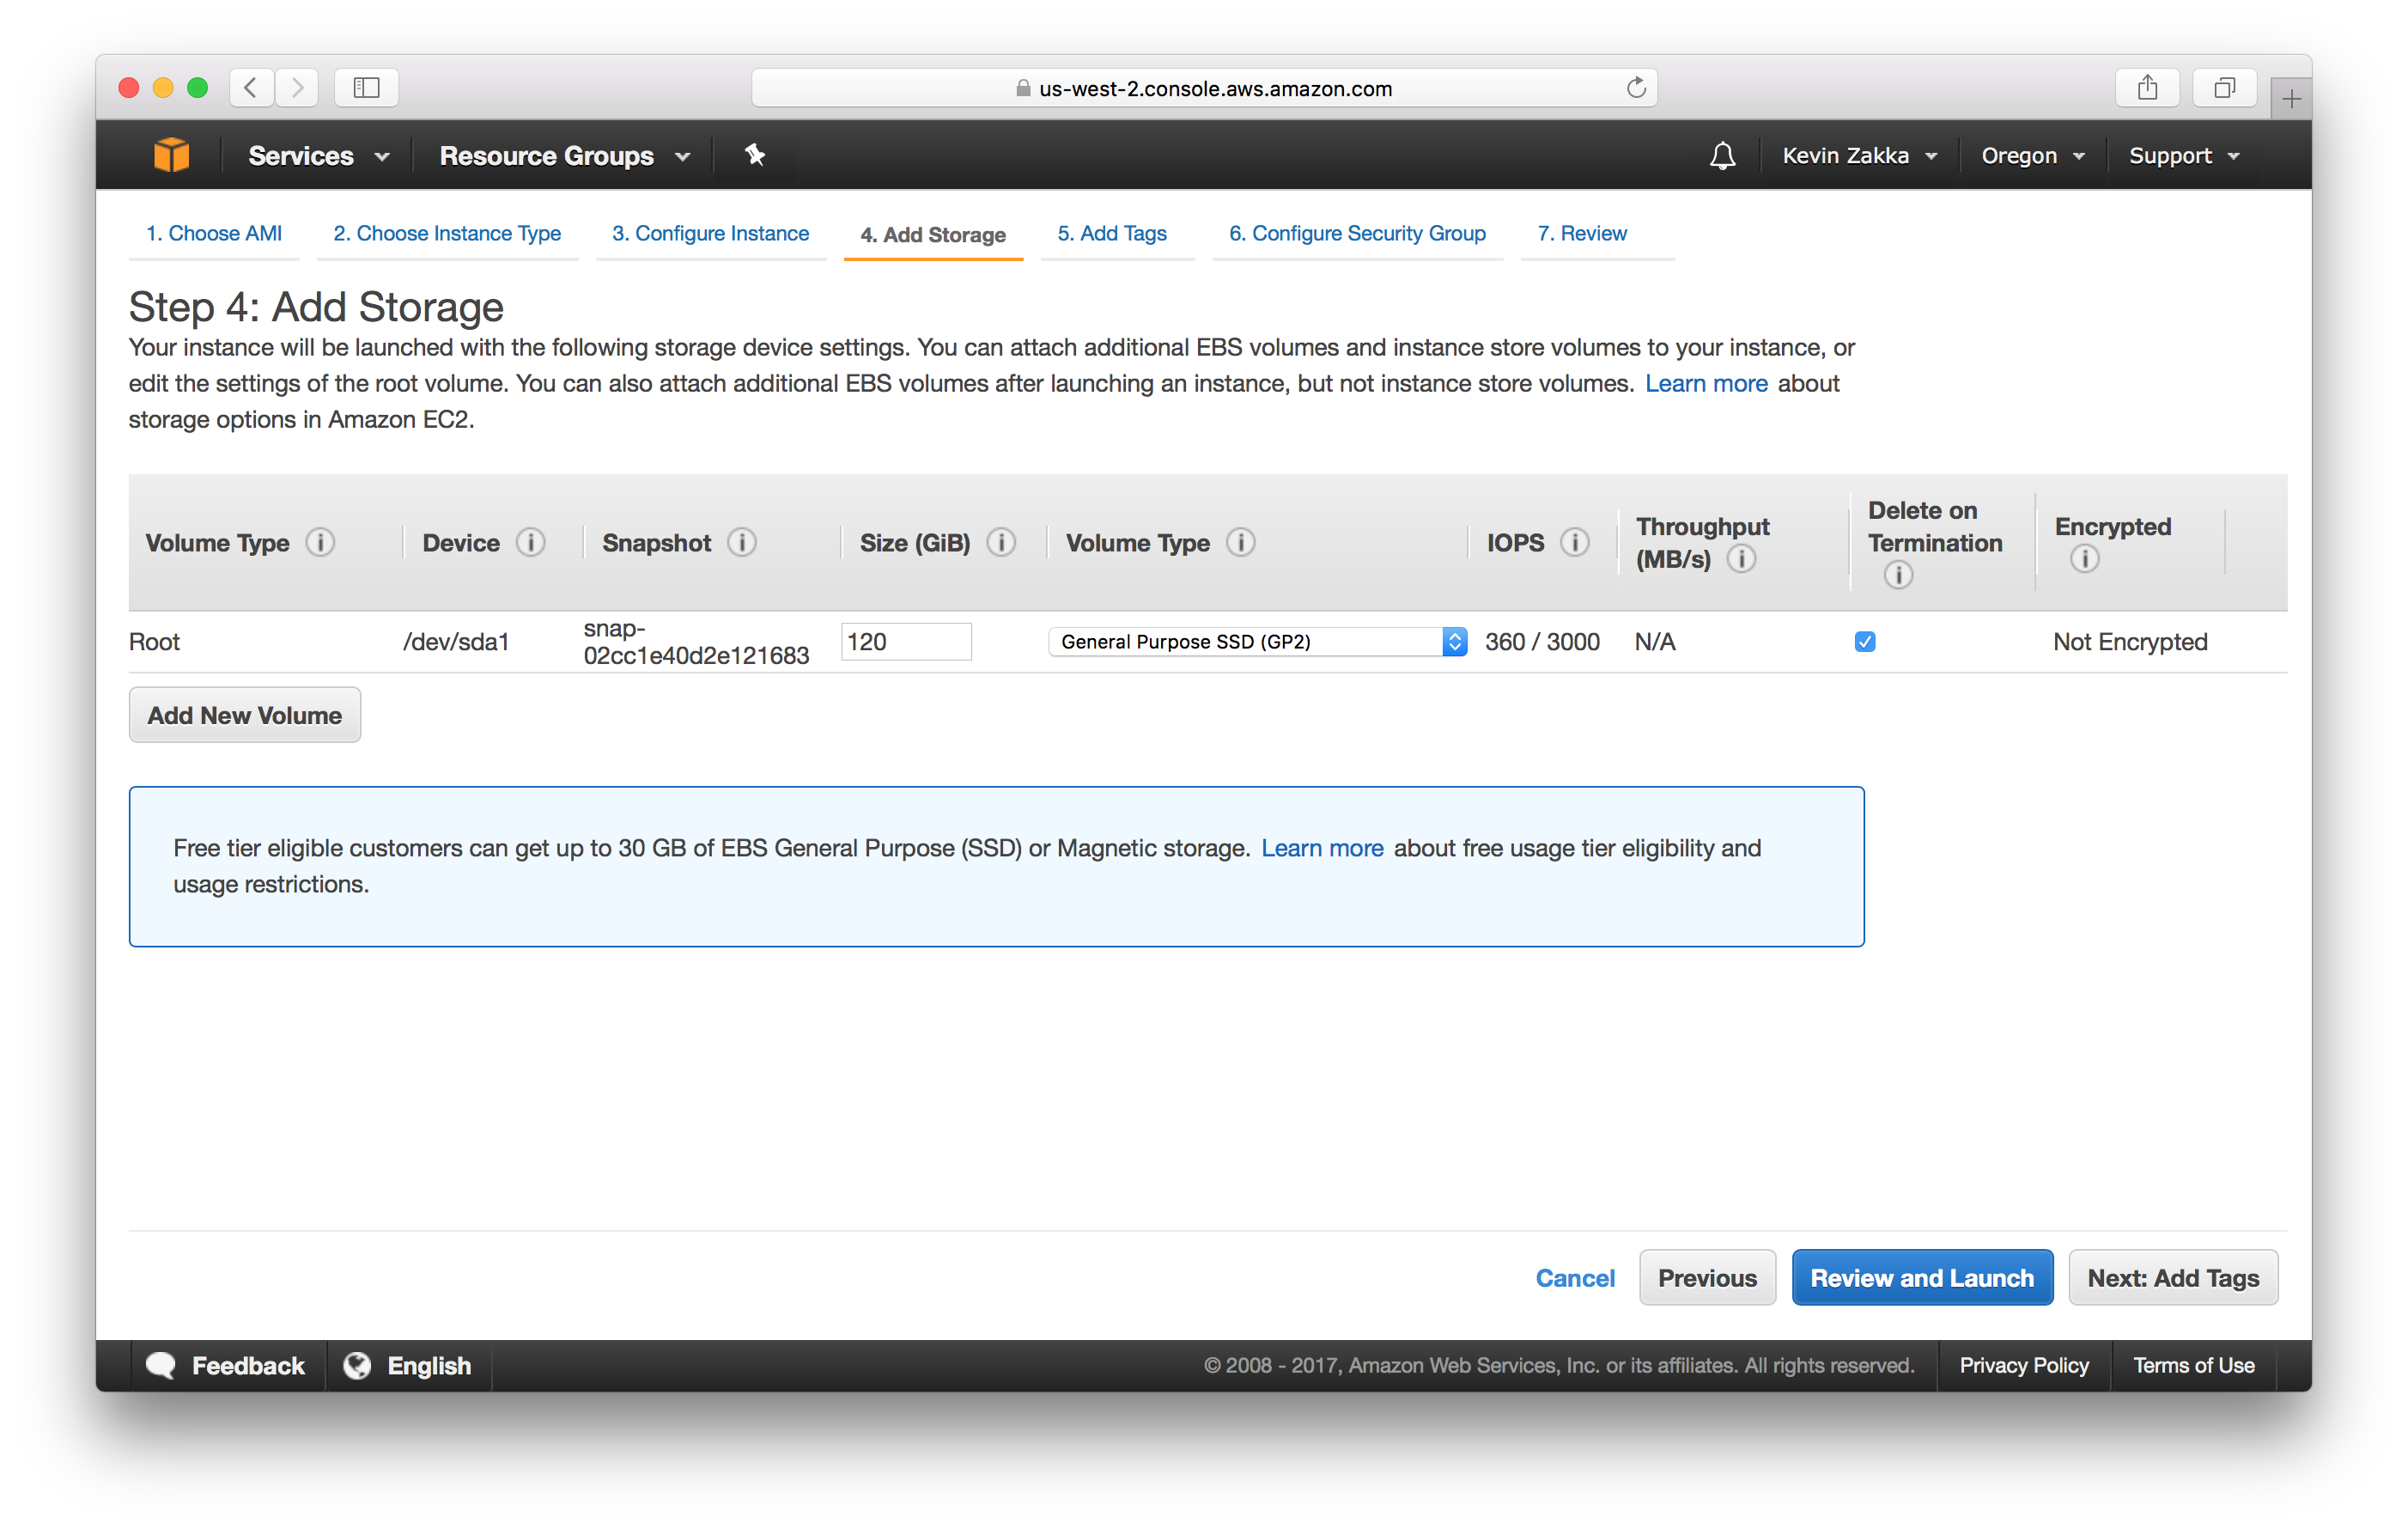
Note that the Root Volume is EBS-backed meaning it persists on instance termination. The default behavior however is to delete it on termination. Weird right? Well, not really. With ephemeral storage, the other type of storage AWS offers, there is no persist option, whether it be on instance stop or terminate. Thus EBS with delete-on-terminate gives us the ability to keep our data on disk when the instance is stopped!
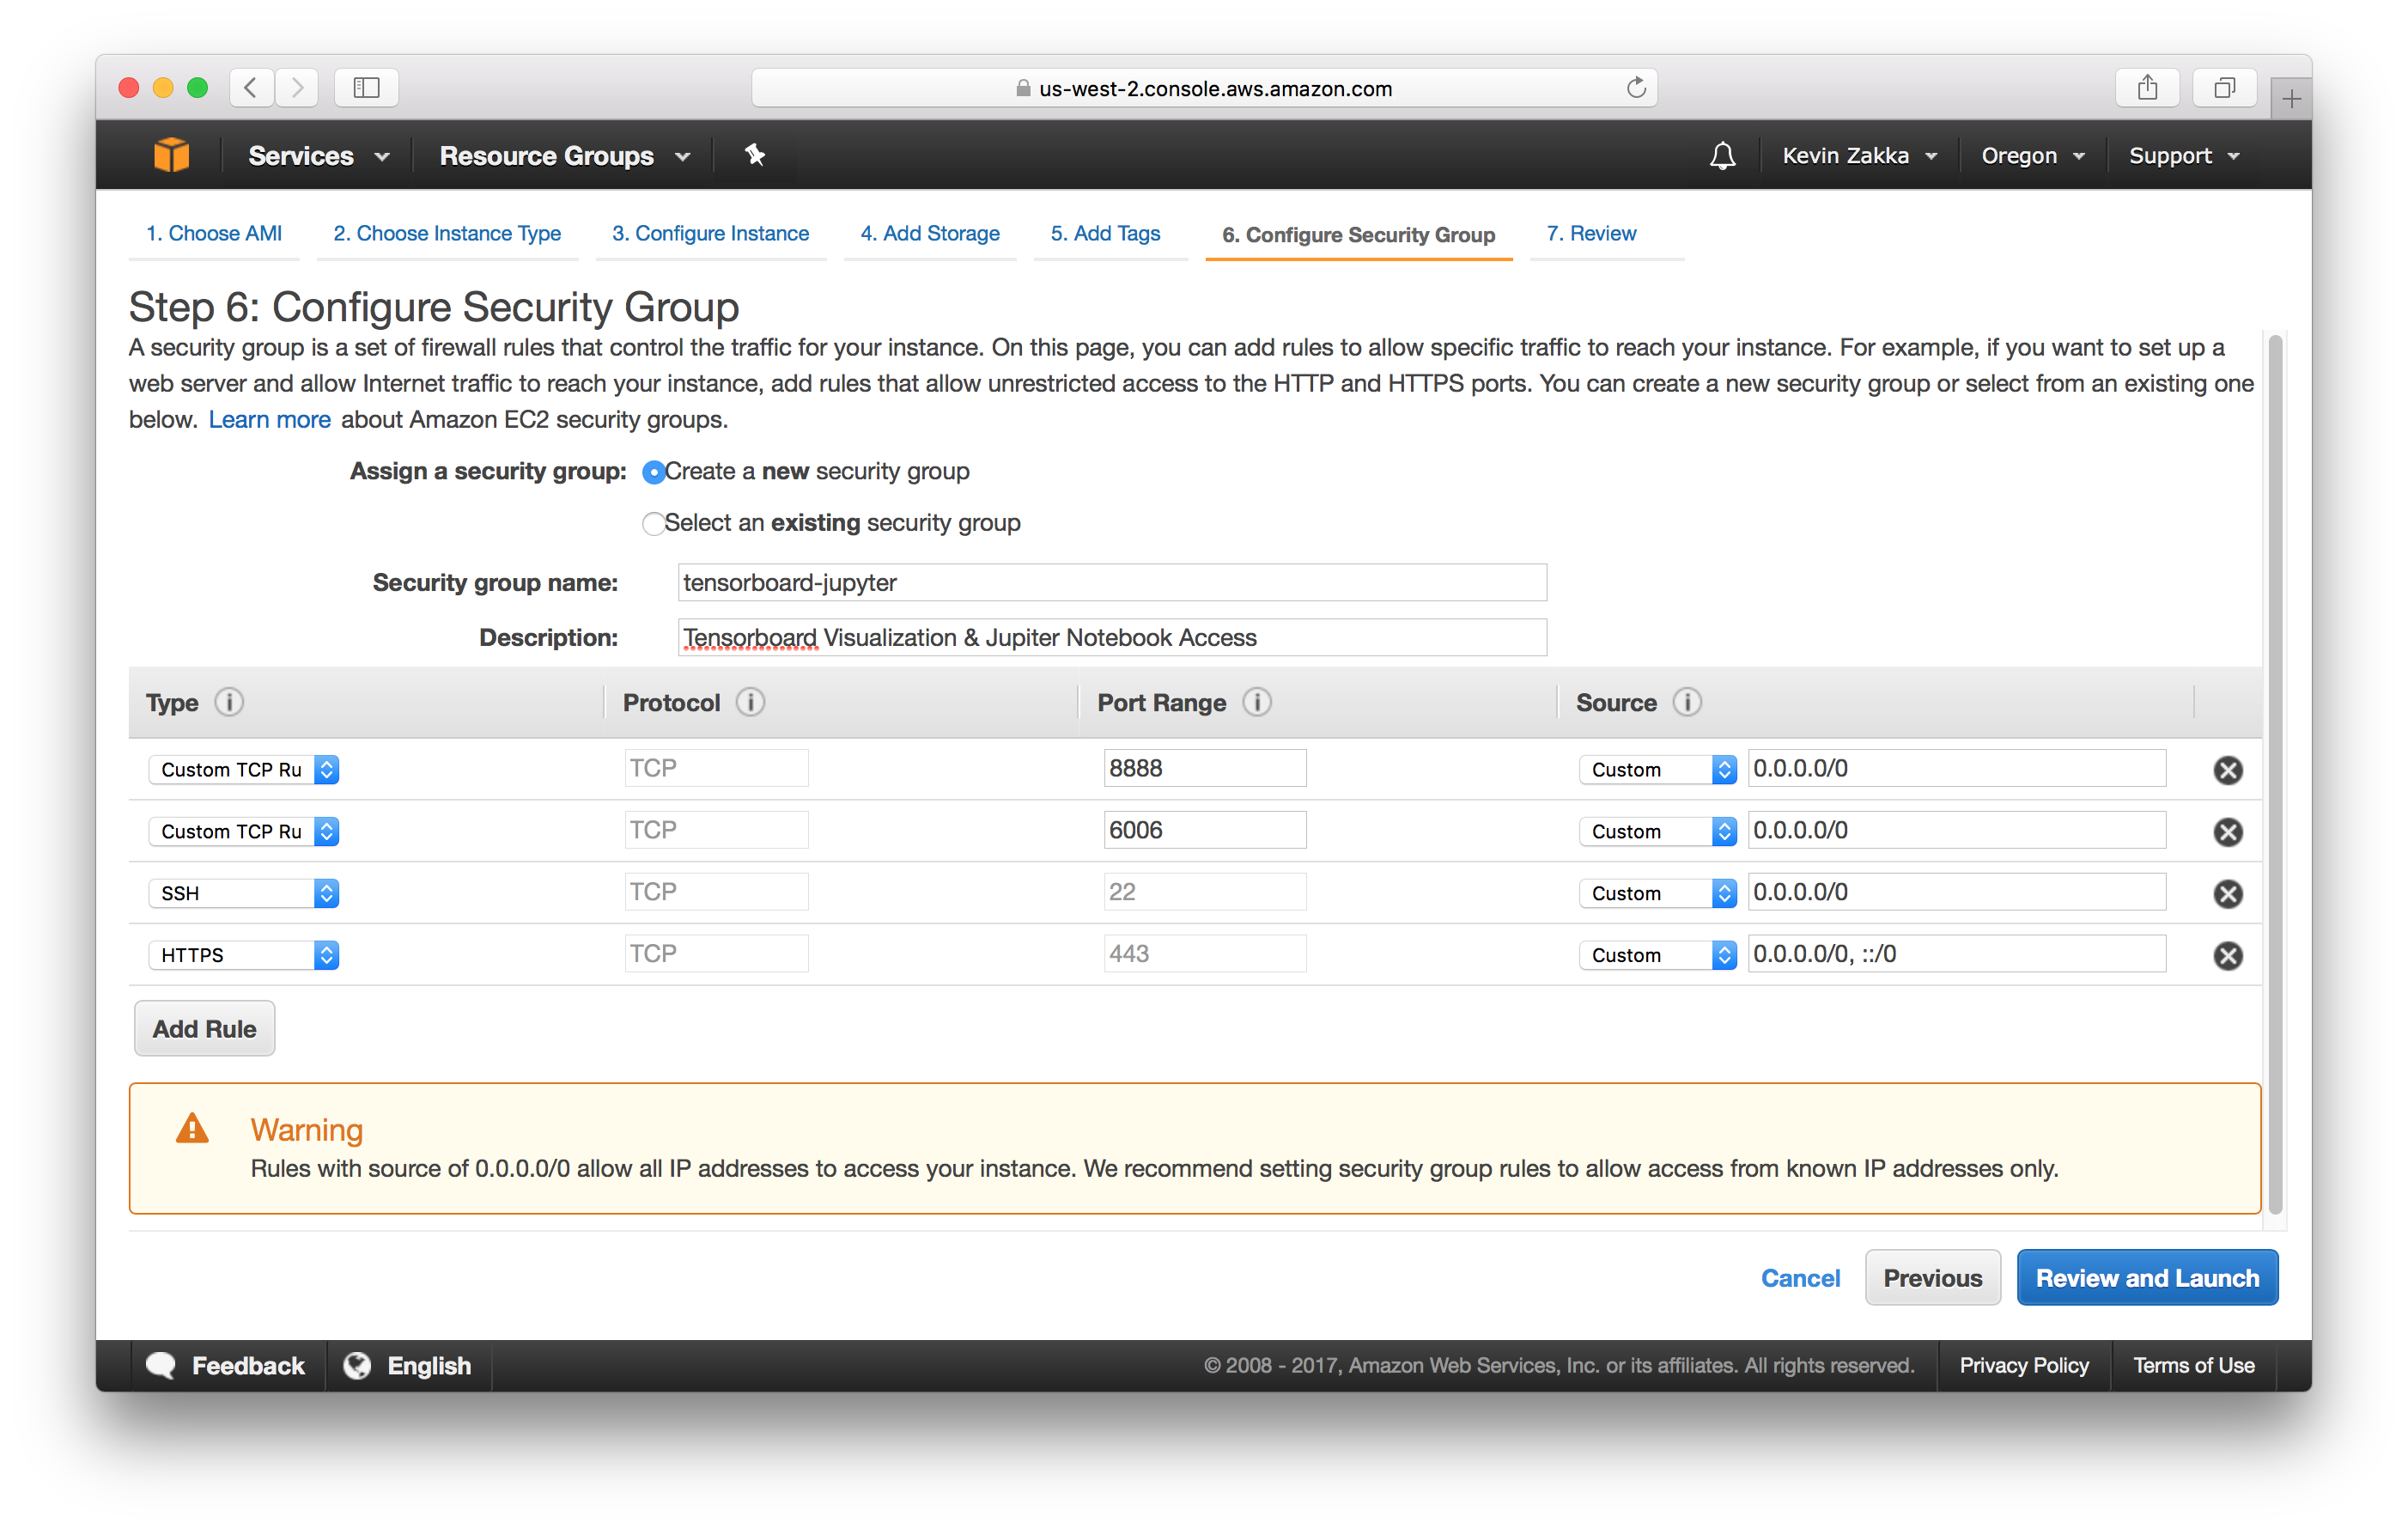
Configure Security Group. You can skip the Add Tags section and jump to this last step. This part is important because it will allow us to monitor our training with Tensorboard and use Jupyter Notebook. We’ll be adding 4 protocols as shown in the picture below.
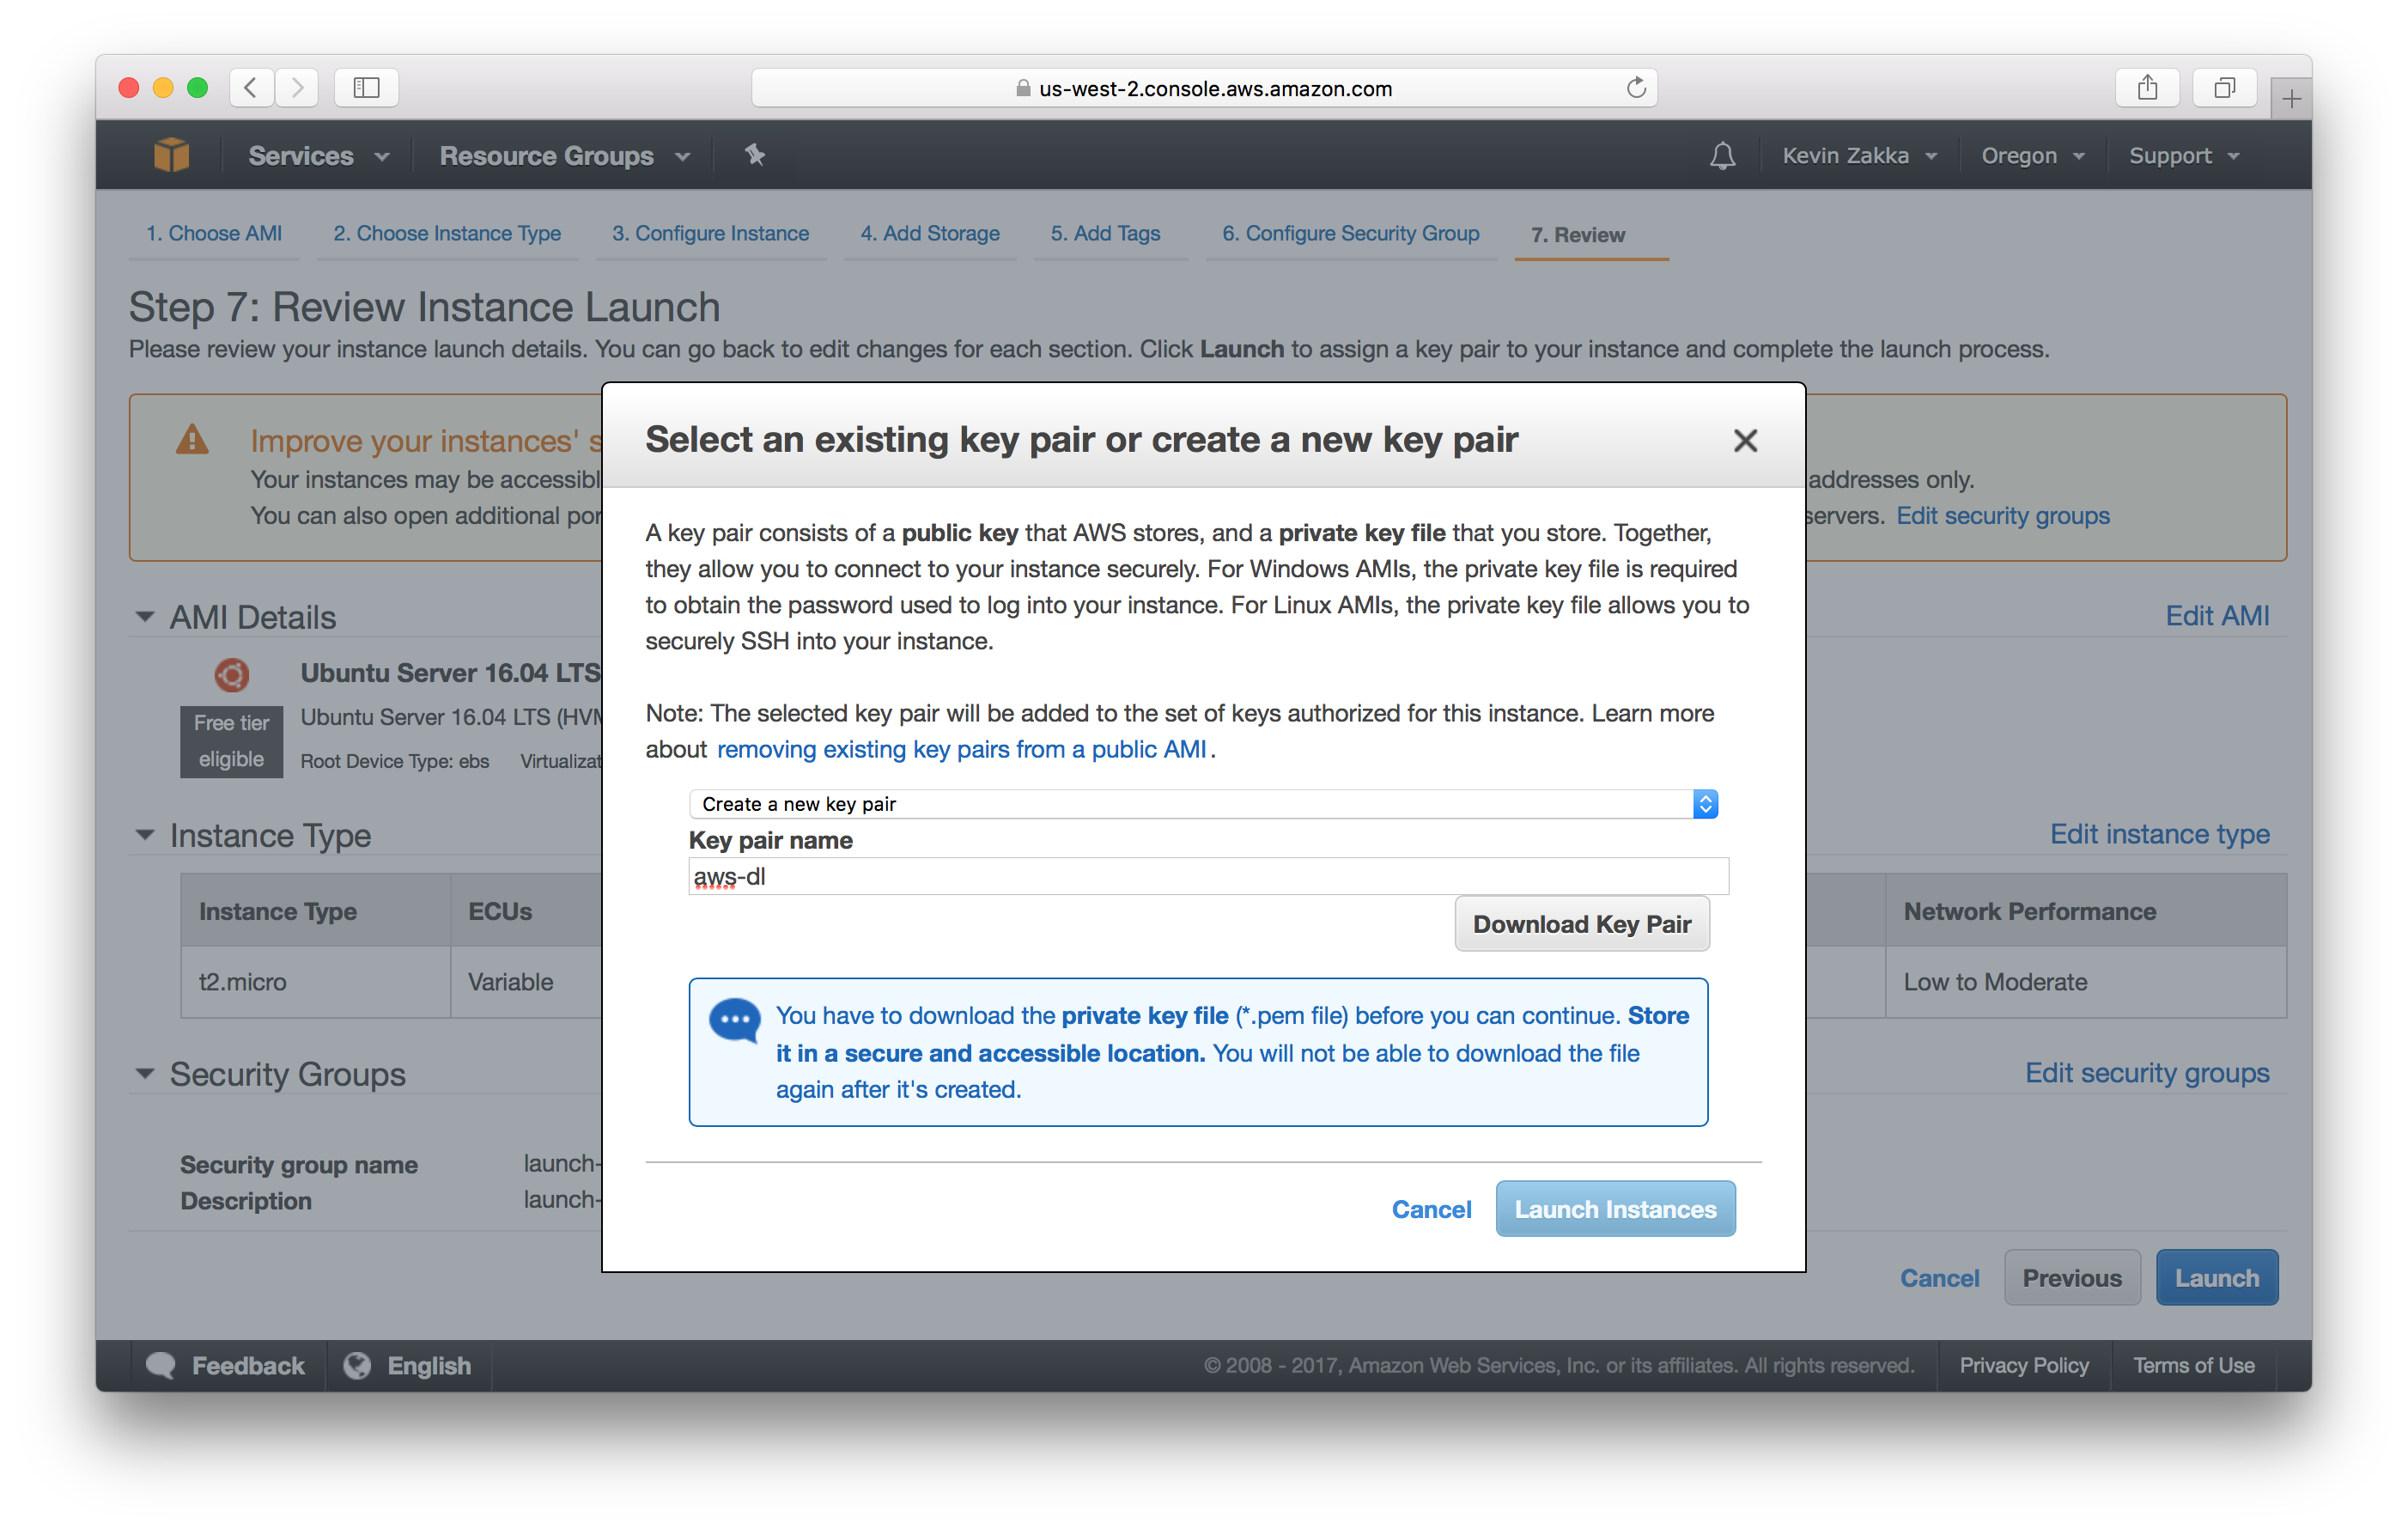
Once you click the launch button, a window will pop up and prompt you to create a key-pair. This little file is needed when ssh-ing into your instance, so download it and store it in a secure location you’ll remember. For this tutorial’s sake, I’ll be calling mine aws-dl.pem and storing it in my Downloads folder.
Launching & Managing Your EC2 Instance
We’ve finally arrived at the point where we can ssh into our EC2 instance. To do so, you’ll need to navigate to the Instances page located in the navigation panel on the left of your screen. You’ll be greeted with the following:
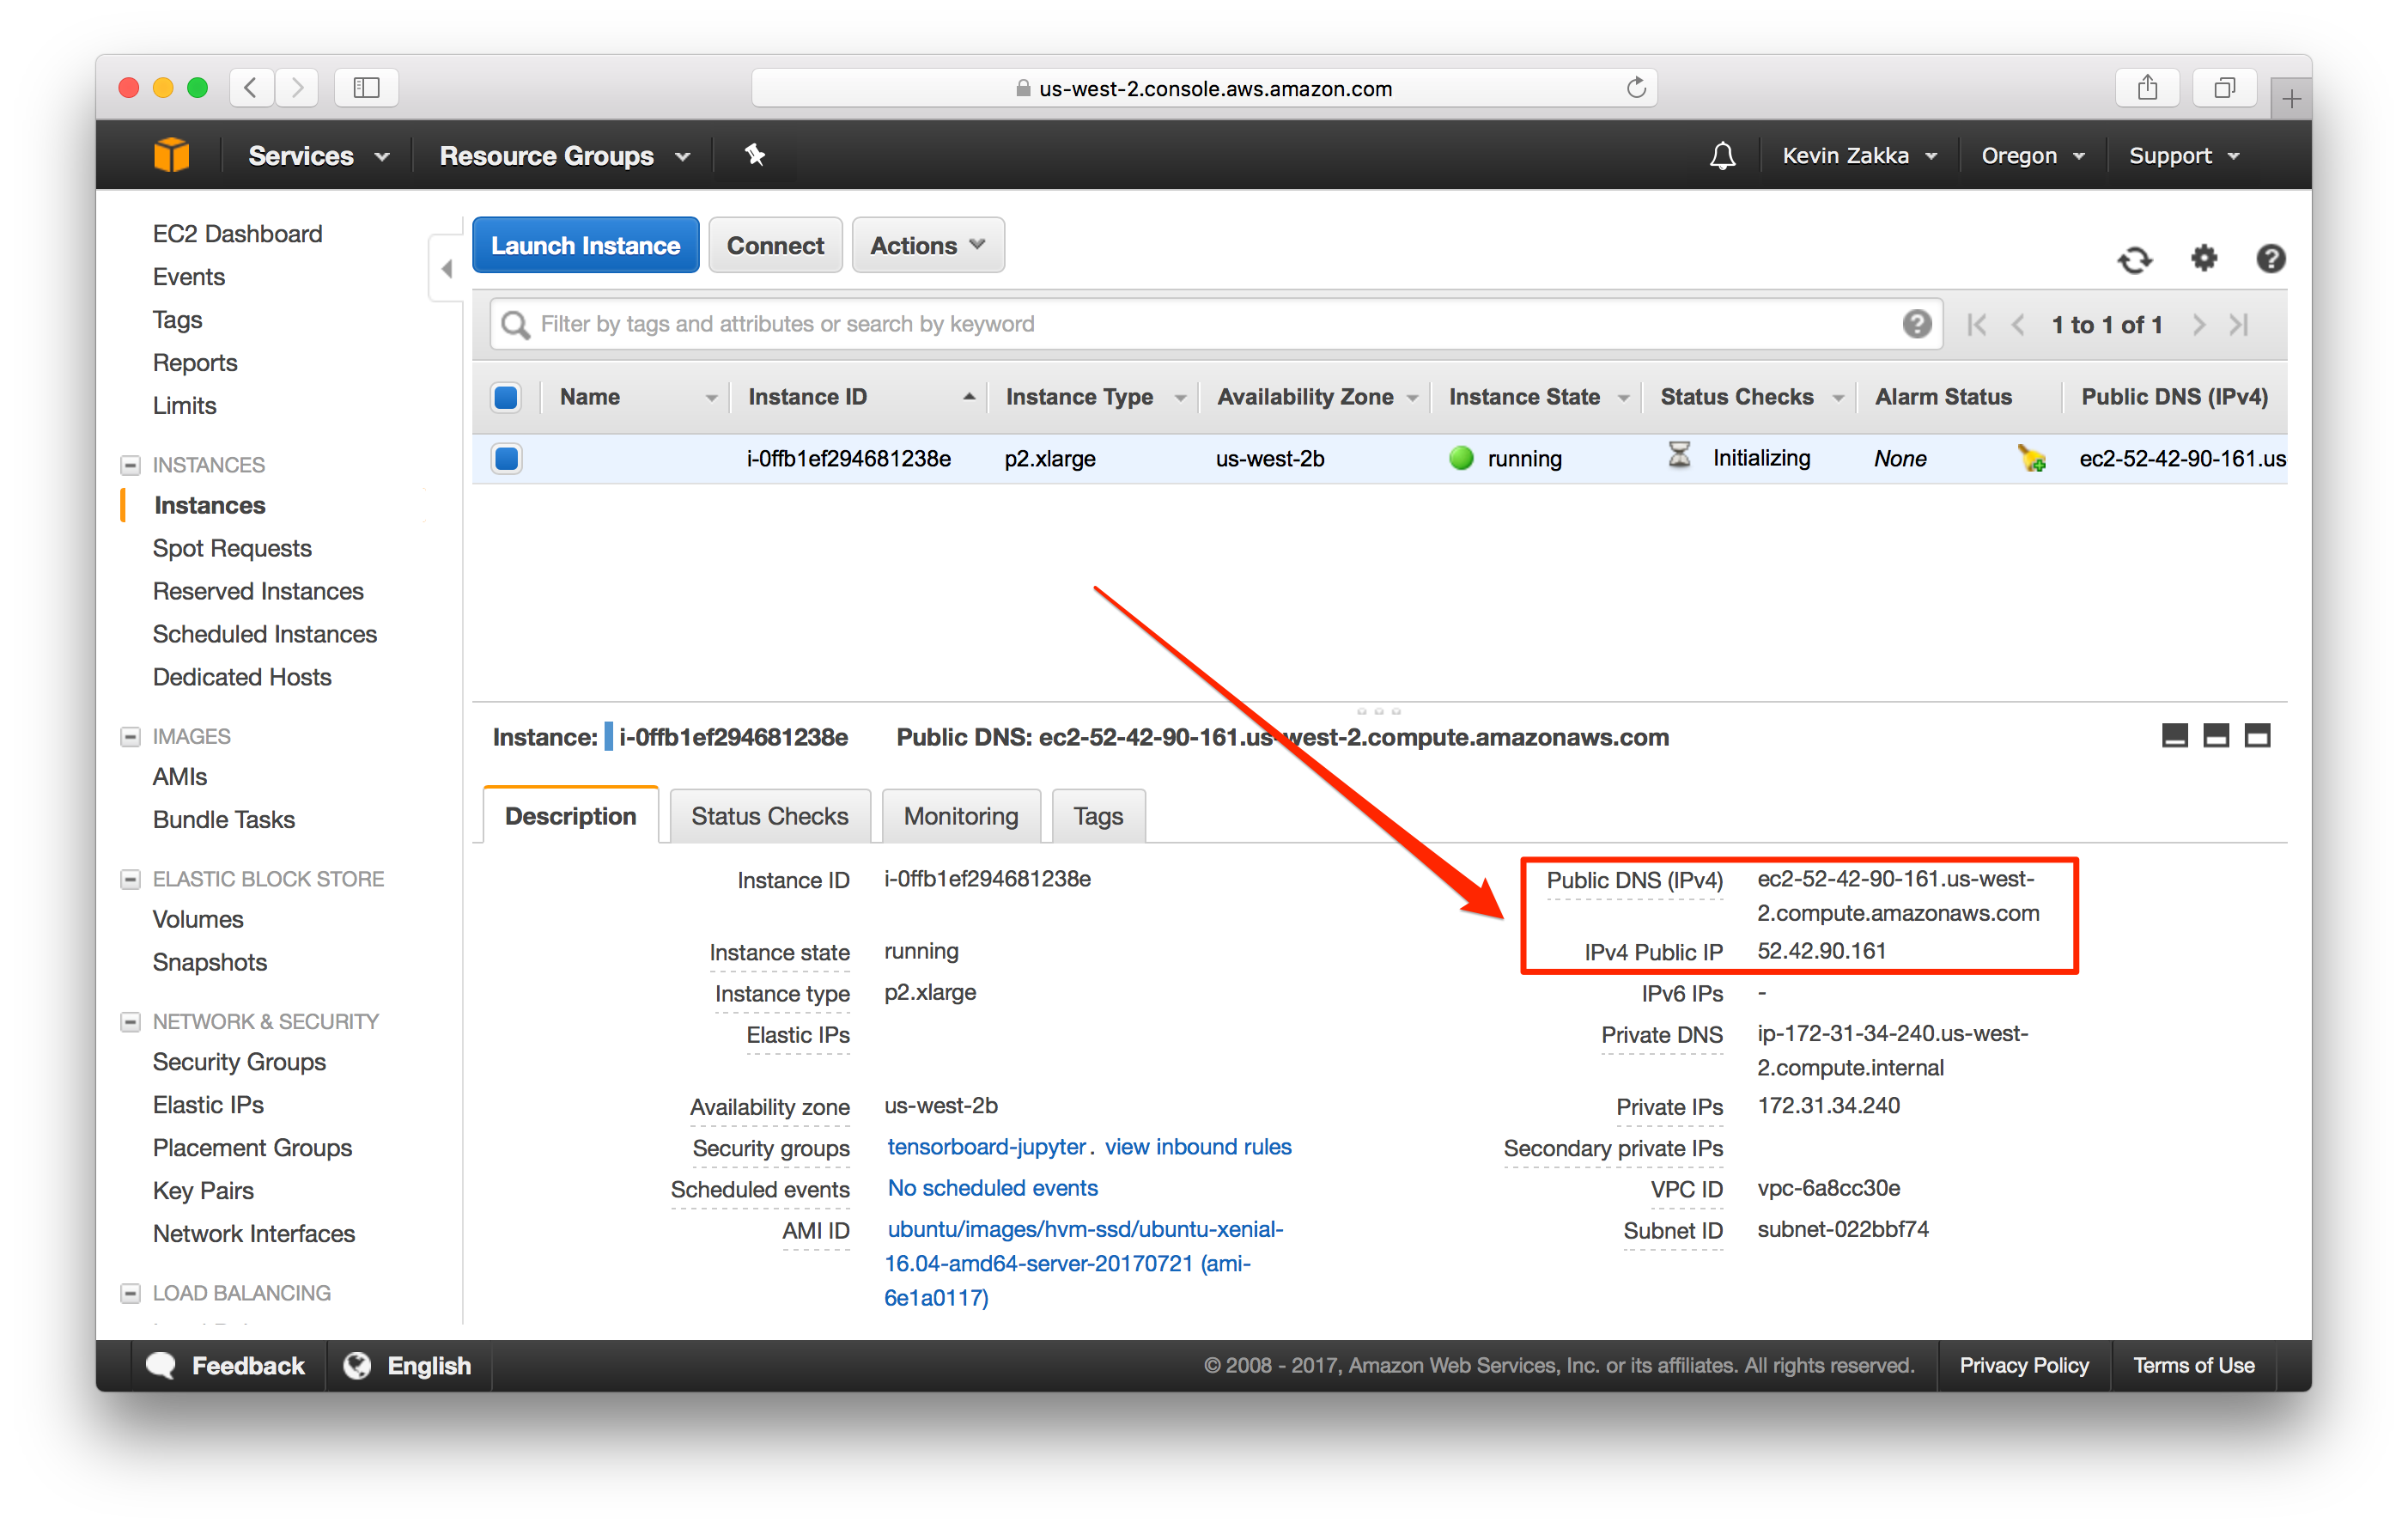
You need to take note of 2 things:
- Public DNS (IPv4):
ec2-52-42-90-161.us-west-2.compute.amazonaws.com - IPv4 Public IP:
52.42.90.161
Other than that, there are just 2 ways to interact with your instance you need to be aware of: login with ssh and copy a file to it with scp.
ssh -v -i X ubuntu@Ywhere X represents the path to the key-pair file and Y represents the Public IP of your instance.scp -i W -r X ubuntu@Y:Zwhere W is the path to the key-pair file, X is the path to the local file, Y is the Public IP, and Z is the destination path on the instance.
It’s important to note that if you’re using the key-pair file for the very first time, you’ll need to change its permission to read and write by running chmod 600 ~/Downloads/aws-dl.pem.
With all that being said, we can finally fire up a terminal and execute the following command:
ssh -v -i ~/Downloads/aws-dl.pem ubuntu@52.42.90.161
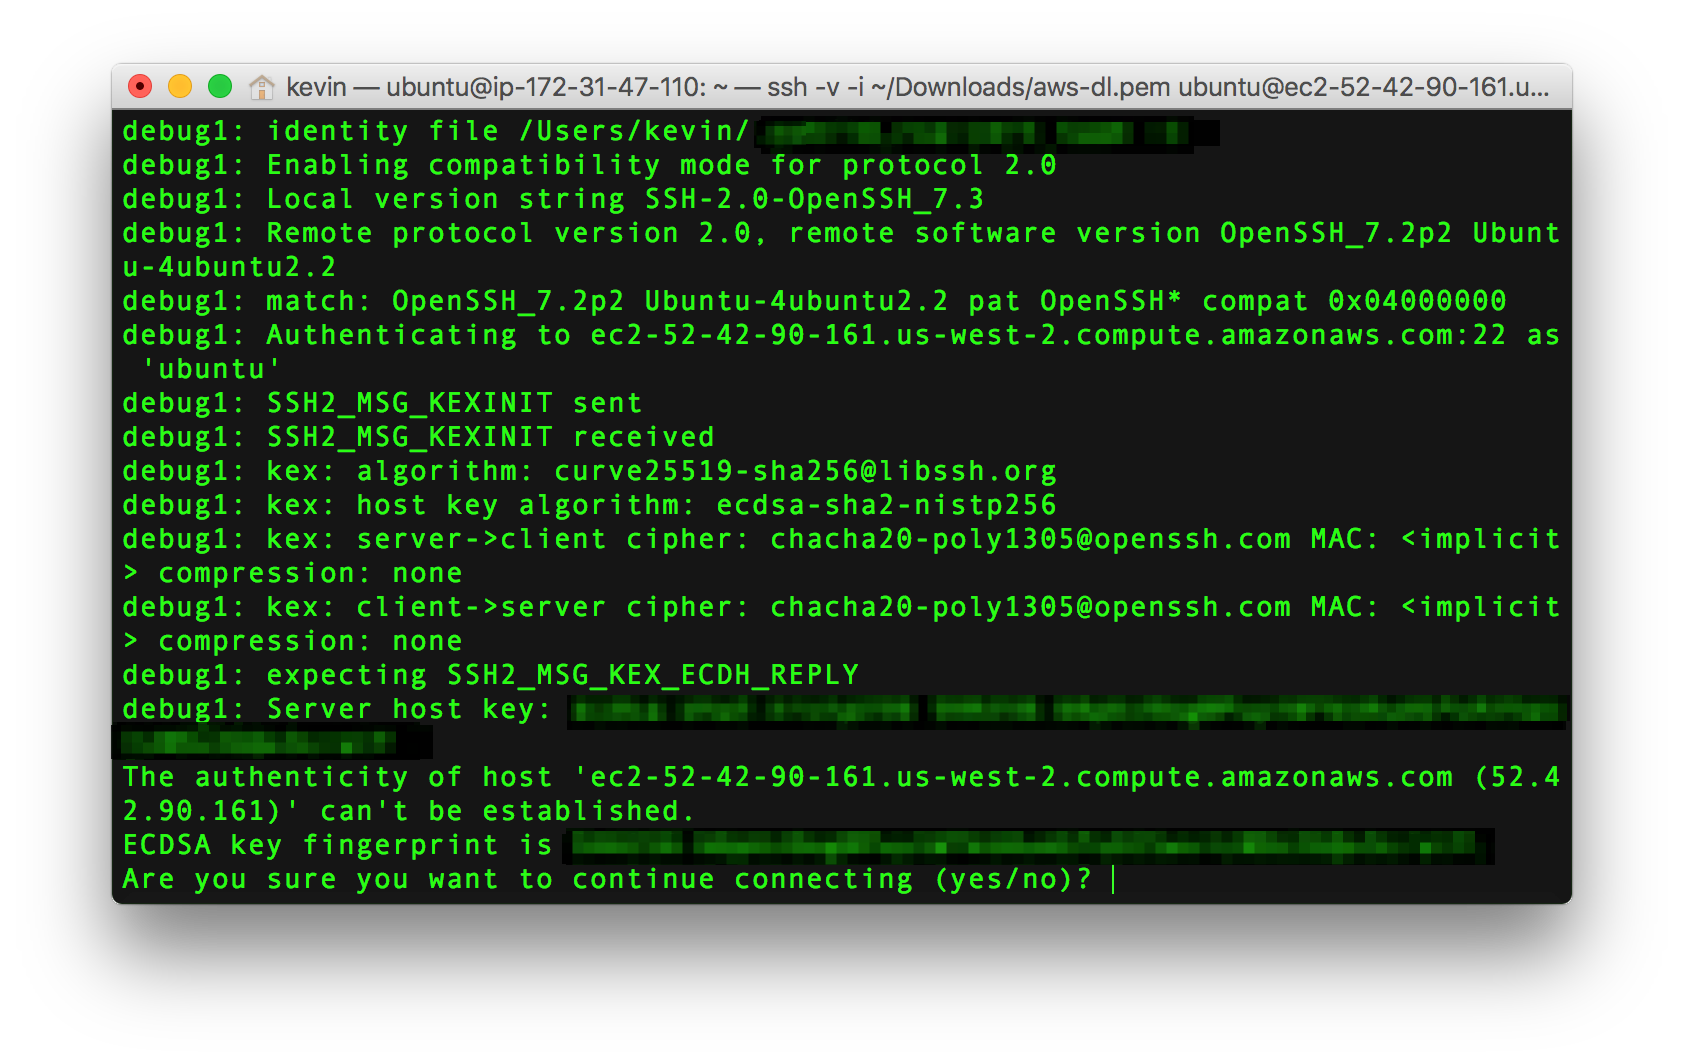
Enter yes, and voila! You should be successfully logged in. The instance is still not ready for use as there are a few more things that need to be done, but fear not. I’ve created a small bash script that you can execute which automates the following:
- It downloads and installs the required nvidia gpu drivers.
- It updates and upgrades the distribution packages.
- It installs python3 along with virtualenv.
- It creates a virtualenv called
deepLthat will house all the required pip packages and PyTorch. - And it finally installs PyTorch v0.2.
Go ahead and download install.sh from my repo and save it to your Desktop. We need to copy it to our instance, so apply the command I mentioned above:
scp -i ~/Downloads/aws-dL.pem -r ~/Desktop/install.sh ubuntu@52.42.90.161:~/.
Next, go back to the terminal window logged into the instance and execute the following 2 commands:
chmod +x install.sh
./install.sh
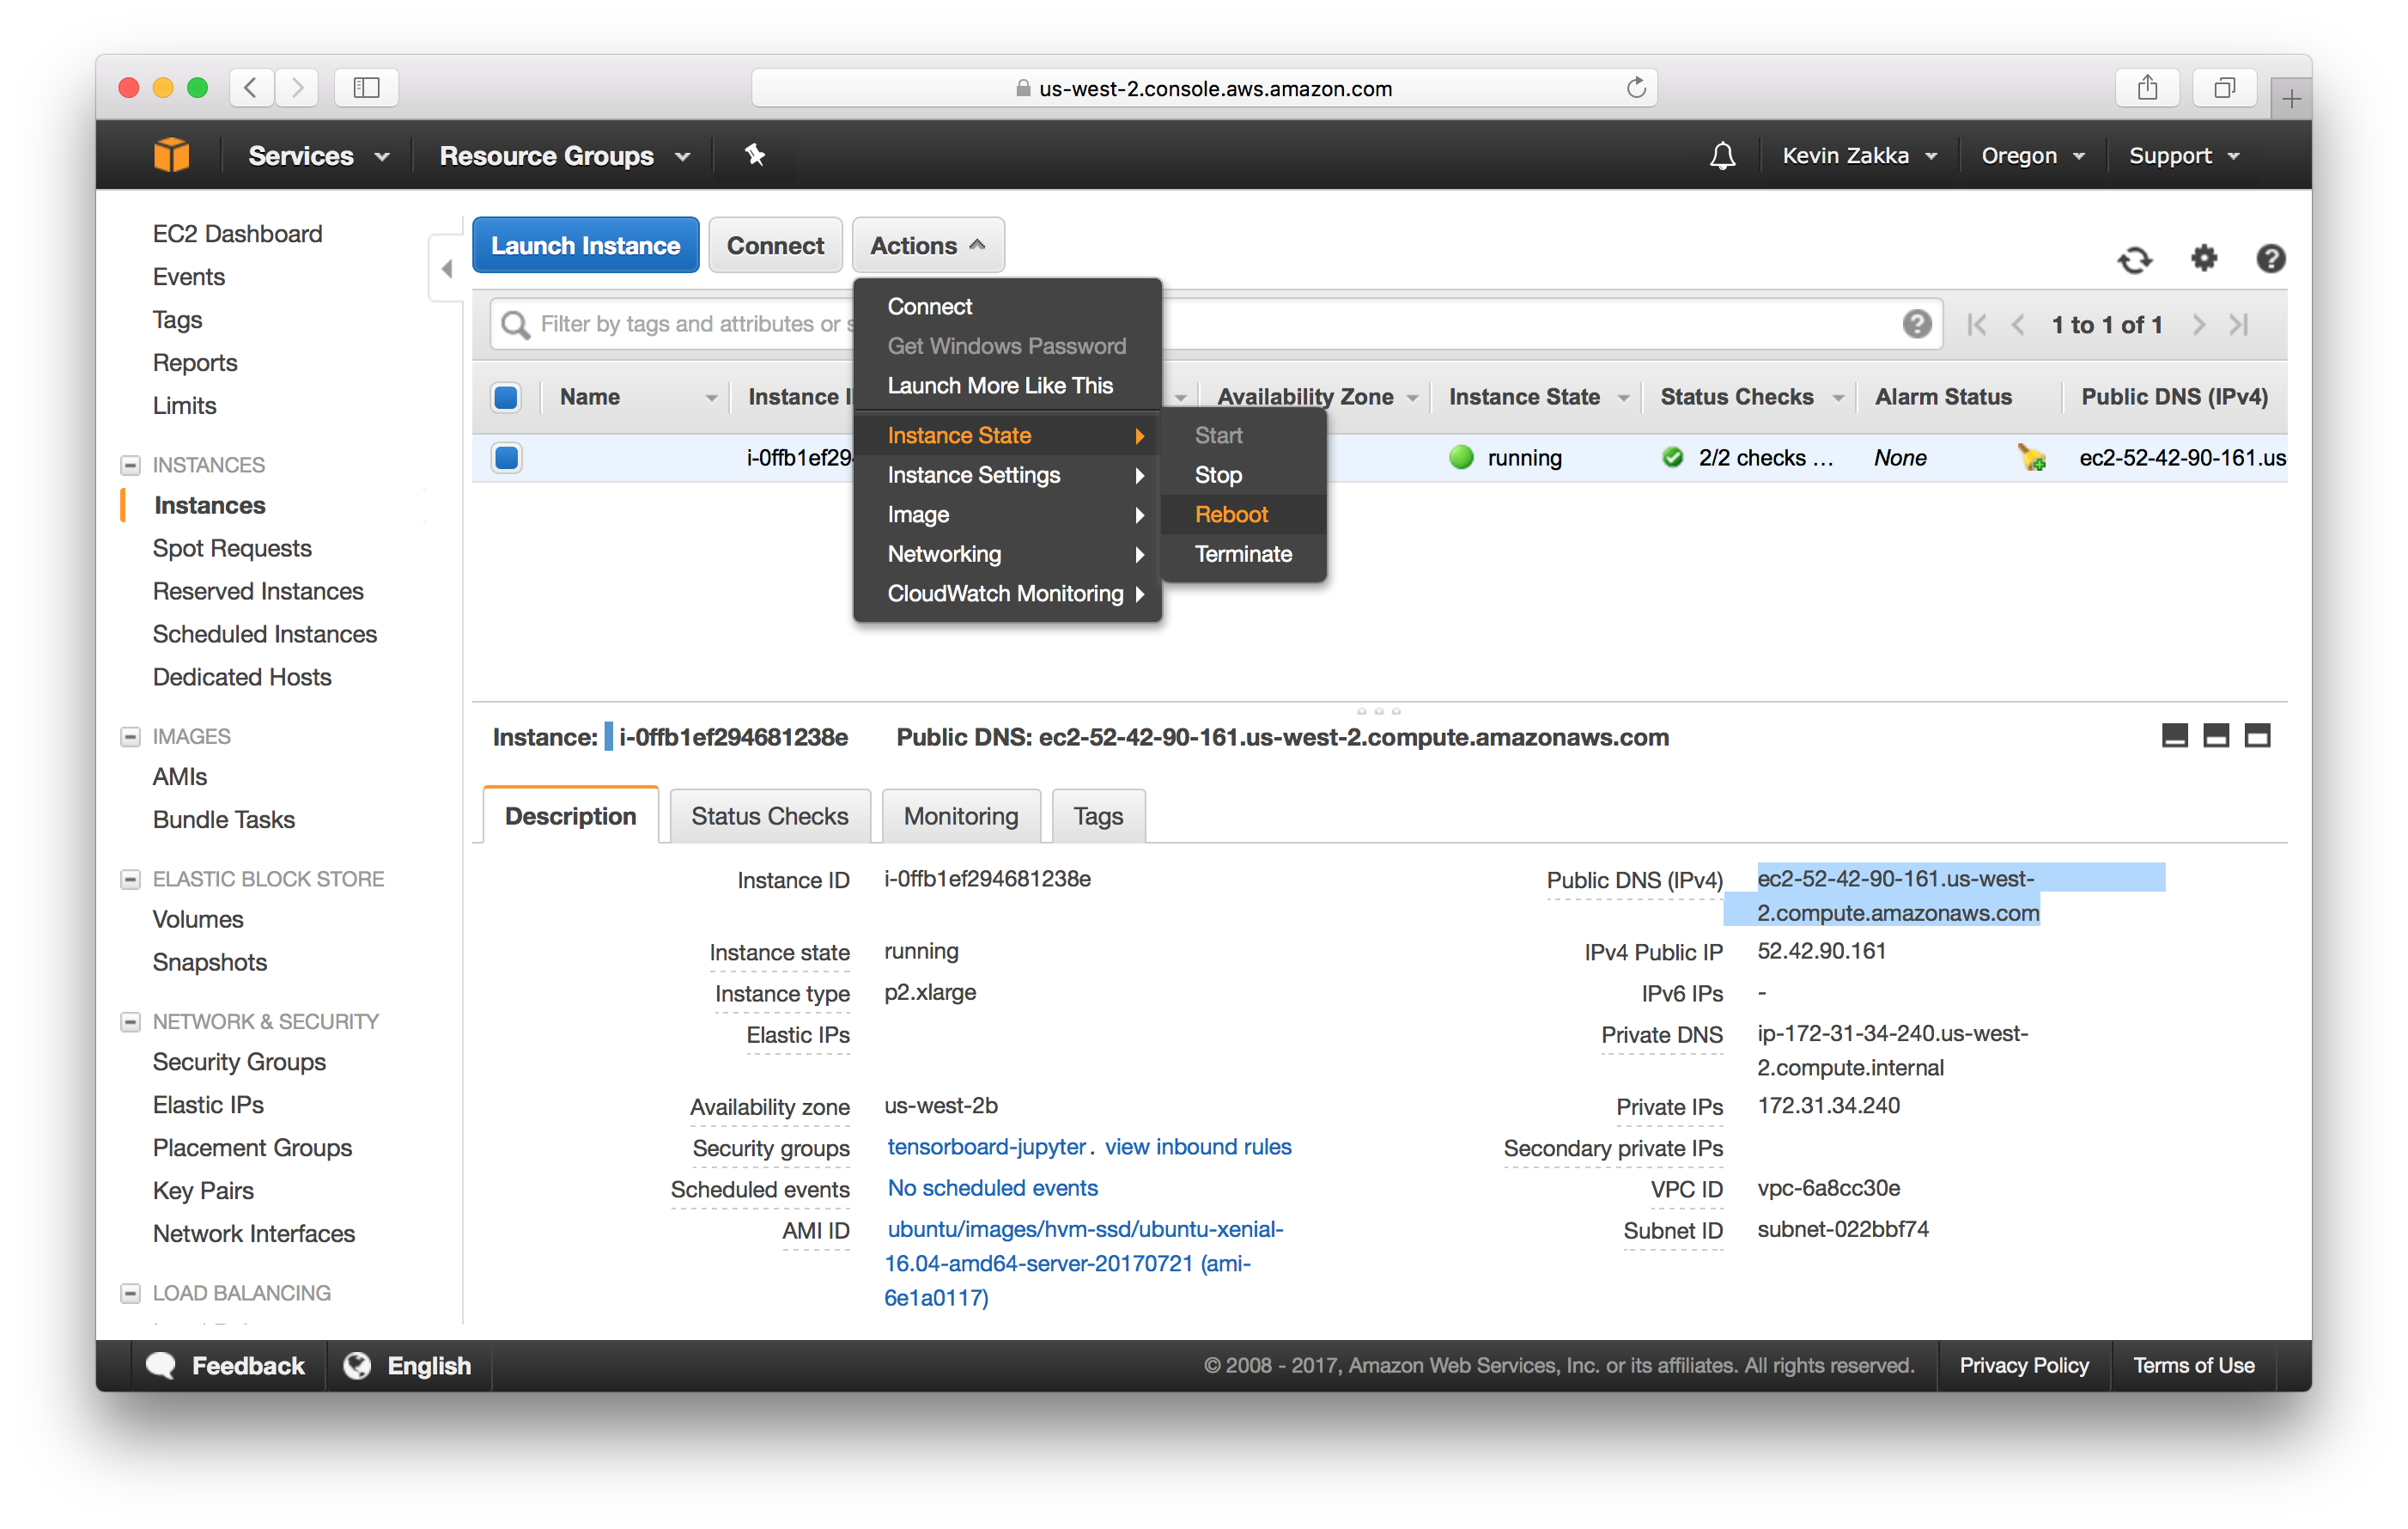
Once that’s done, you’ll need to reboot your instance. Enter exit at the command line and navigate to your browser as in the image below. Be patient and wait for a few minutes before you ssh back into the instance!
At this point, we should sanity check our installation by seeing if PyTorch loads correctly.
- First, activate the virtualenv by executing
source ~/envs/deepL/bin/activate. - Enter
pythonand inside the interpreter,import torchthentorch.__version__. Fingers crossed, this should print out0.2.0_1. - Lastly, check that the GPU is visible by typing
torch.cuda.is_available()which should print out True.
Once you’ve finished working on your instance, you should stop it immediately to avoid incurring additional charges.
SSH Persistence With TMUX
I would be doing you a great disservice if I didn’t mention this nifty little package called tmux that you can use when running your instances for long periods of time. What exactly is tmux, and why should you use it?
Well, if you’re shhed into an instance, peacefully running a job, and your connection suddenly drops, your ssh connection will automatically get killed. This means anything running on that instance stops as well (i.e. your model will stop training). Closing your laptop to commute from university to your house for example becomes a big no no.
This is where tmux comes in! Tmux makes it so that anything running within a session persists even if the connection drops or the terminal gets killed. To see it in action, I’d suggest you watch the following video.
Thus, your workflow should always be as follows:
- SSH into your aws instance.
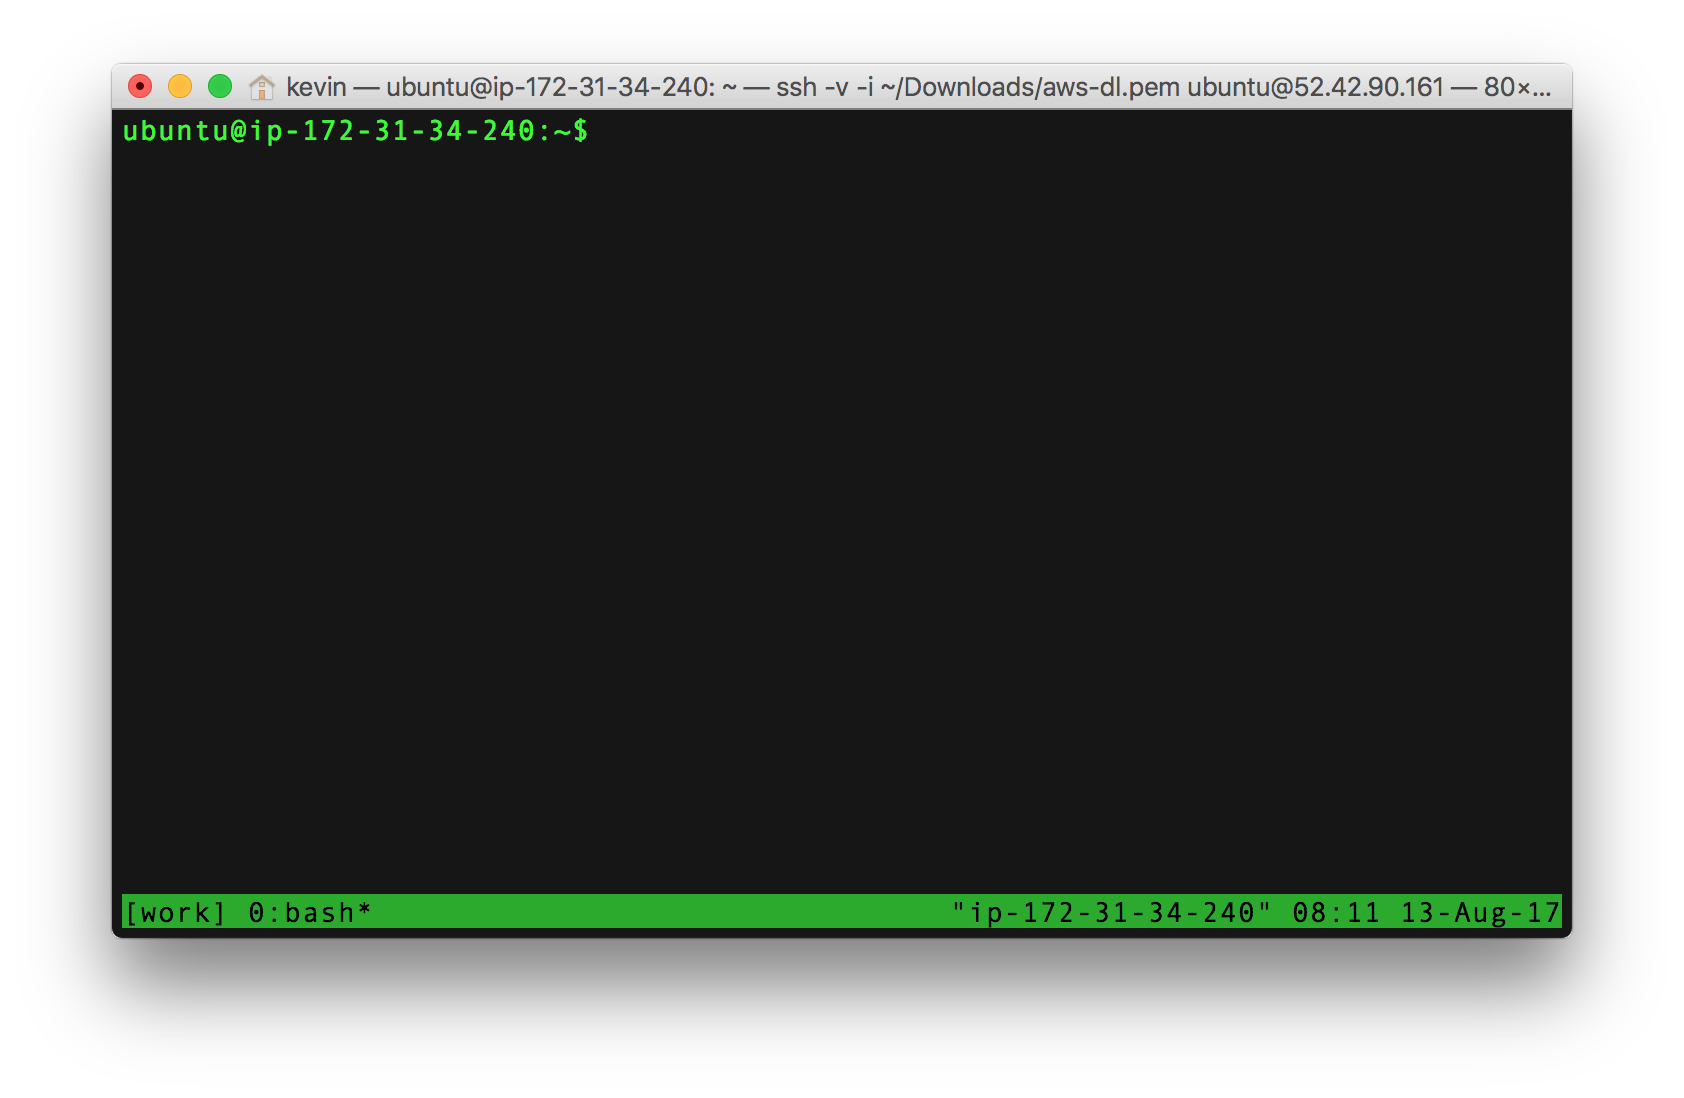
- Create a new tmux session called work using the command
tmux new -s work. - Do everything as you would previously.
- Detach from the session by pressing
ctrl-bfollowed byd.
Once you’ve detached yourself from the session, you can work on anything else, even go to sleep… Subsequently, if you need to reattach to that particular tmux session to check your progress, run tmux a -t work.
That’s pretty much it. For a more complete list of tmux commands, you should refer to this lovely cheatsheet.
Conclusion
In this tutorial, we went over the basic steps needed to create a free, GPU-powered Amazon AWS instance. We explored how to interact with our instance using the ssh and scp commands and how a bash script could be leveraged to download and install all the required packages needed to run PyTorch. Finally, we saw how we could make our ssh session persistent using a very important program called tmux.
Until next time!
-
This is for a GPU-powered p2.xlarge instance with an on-demand price of around $0.9/hr. ↩
-
A terminated instance gets deleted, meaning you lose whatever’s on there permanently. On the other hand, a stopped instance just goes offline so you don’t get charged for it and you can fire it back up again at a later time. ↩